OPNsense VM Setup
OPNsense firewall VM download and setup for VirtualBox.
Download and Extract the ISO File
Download OPNsense NGFW from: https://opnsense.org/download/
Set the image type to dvd and the mirror location to the closest location relative to you
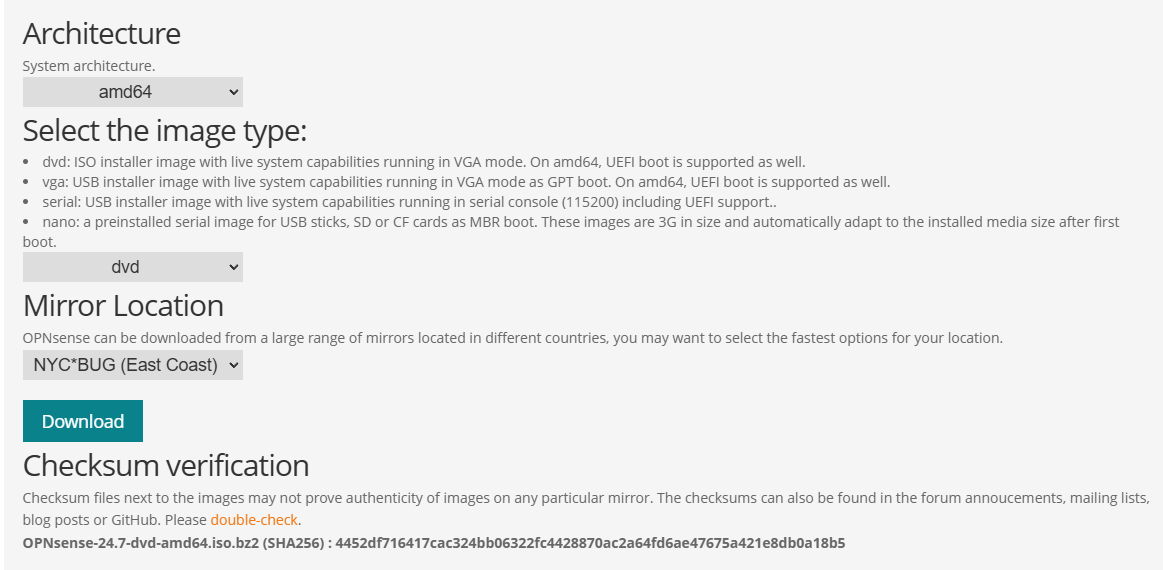
The ISO is compressed in a special extension .bz2 and needs to be decompressed using bzip2. You can get bzip2 from: https://gnuwin32.sourceforge.net/packages/bzip2.htm
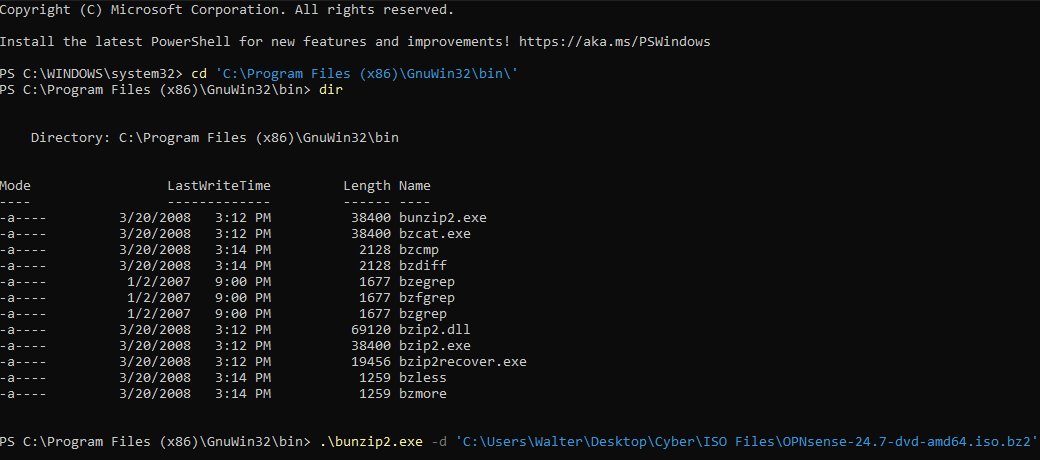
Once you downloaded bzip2, open PowerShell as administrator and navigate to the default directory where the bzip utilities are stored
In my case, C:\Program Files (x86)\GnuWin32\bin
run bunzip.exe with the -d option to decompress, followed by the path where the bz2 file is stored
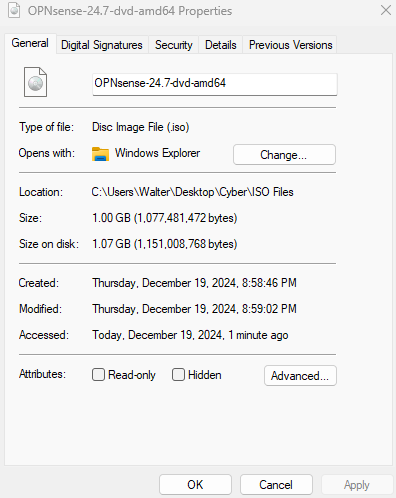
We should now have the OPNsense ISO file
VM Configuration
Open VirtualBox and click Machine > New from the top left menu
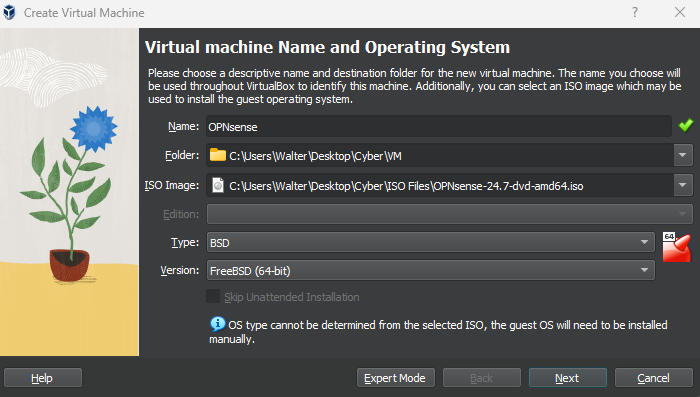
Set a name for the VM (OPNsense)
Select the OPNsense ISO file
Set the type to BSD and the version to FreeBSD (64-bit)
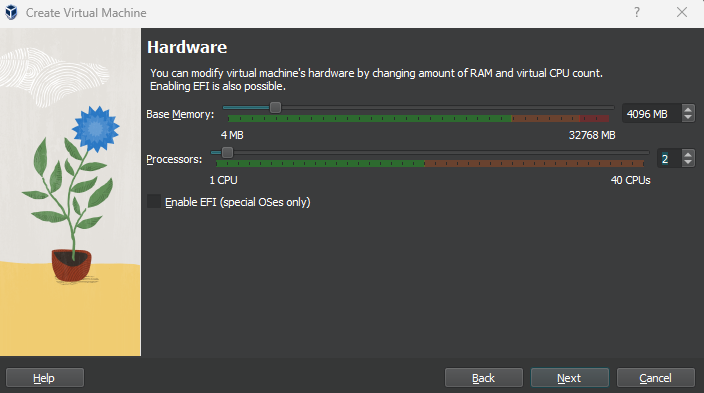
I chose 4GB of RAM and 2 CPUs. You can always adjust this later if needed.
Refer to https://docs.opnsense.org/manual/hardware.html for OPNsense VM hardware requirements.
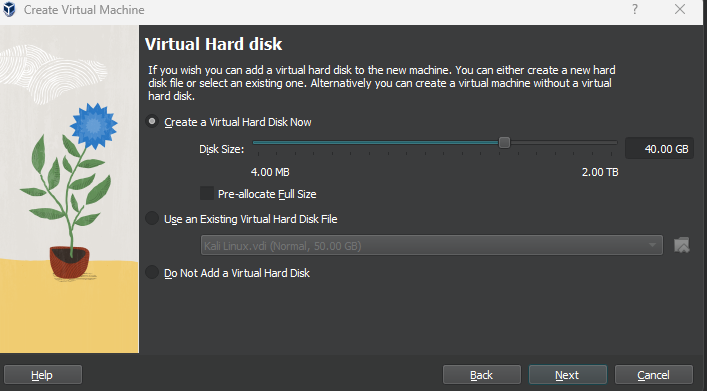
I set the storage to 40GB. Again, we can adjust this if needed
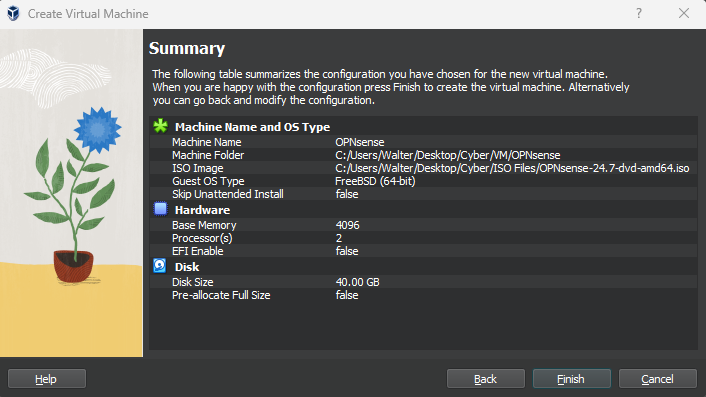
Make sure the configurations are correct and the path to the .iso file is correct
Then, click finish
Do not boot the VM yet, we need to configure the network adapters according to our topology
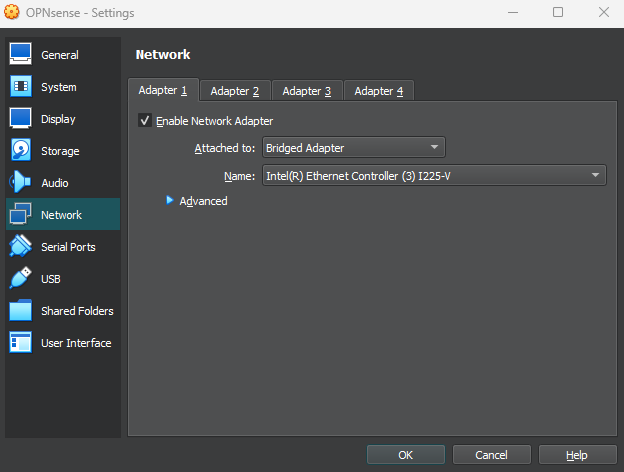
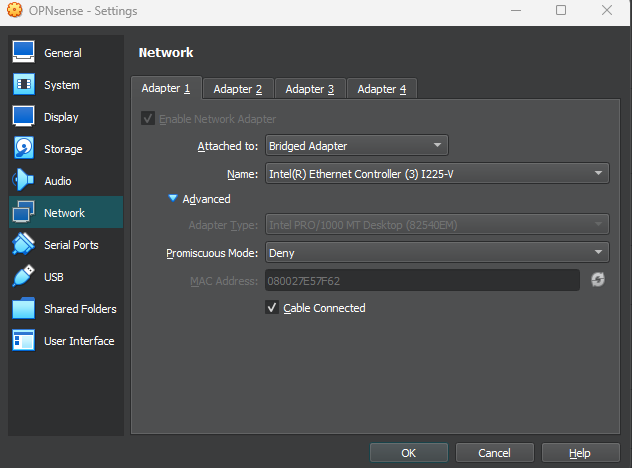
Right click on the VM, head to Settings > Network
Our firewall needs 4 network adapters
Set adapter 1 to Bridged
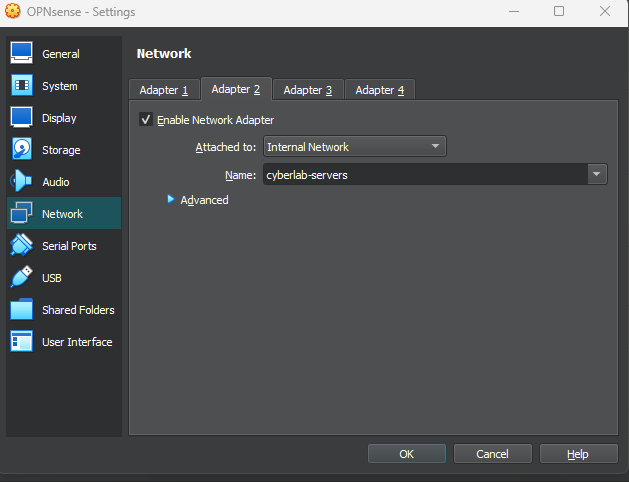
Enable Adapter 2 and set it to internal network for our servers (cyberlab-servers)
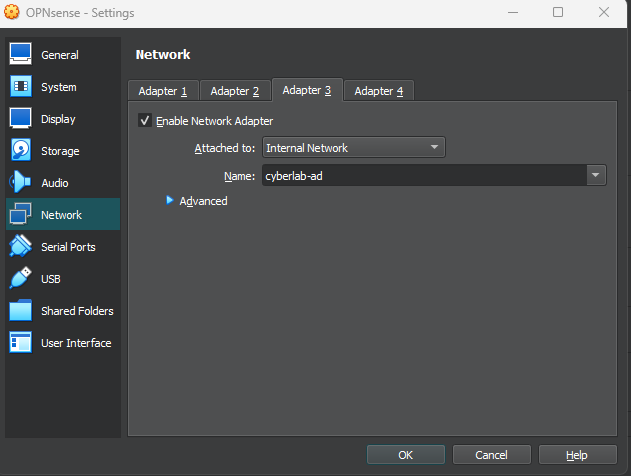
Enable Adapter 3 and set it to internal network for our Active Directory clients (cyberlab-ad)
Enable Adapter 4 and set it to internal network for our administrators/SOC analysts (cyberlab-admins)
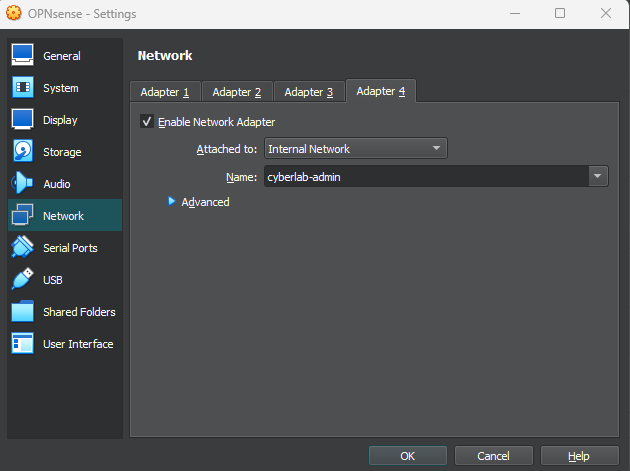
Our adapters should look like this

OPNsense Setup
Boot the VM
When asked to confure LAGGs and VLANs, enter n for no
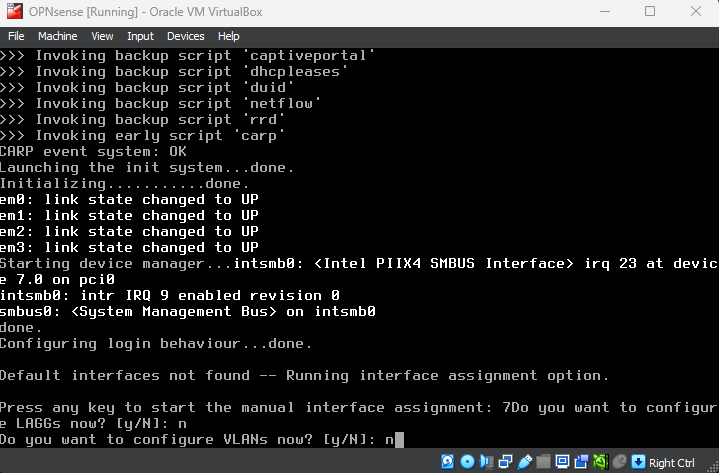
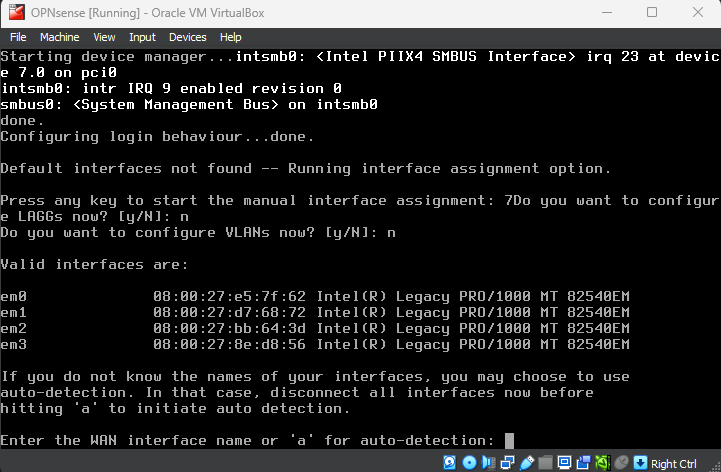
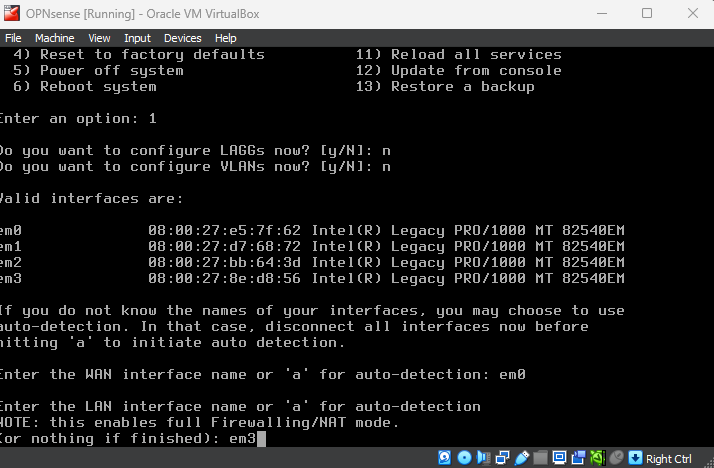
When asked for the WAN interface name, select the name that corresponds to the bridged adapter. It is usually em0 by default, but double check the MAC address to make sure.
Right click the VM, click on Settings, and head to the Network section.
In this case, em0 is the Bridged Adapter (MAC addresses match)
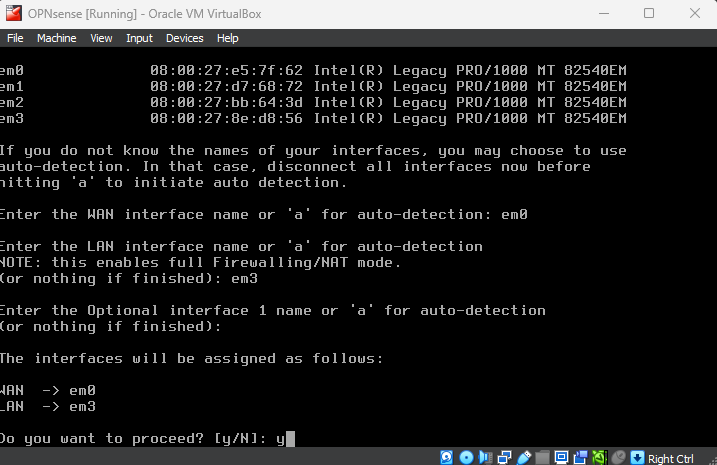
Select em0 for the WAN interface. Leave the LAN interface empty for now and proceed

This VM should get an IP from the home router via DHCP

Once that is done, log in to start the OPNsense installation
Use the credentials:
login: installer
password: opnsense

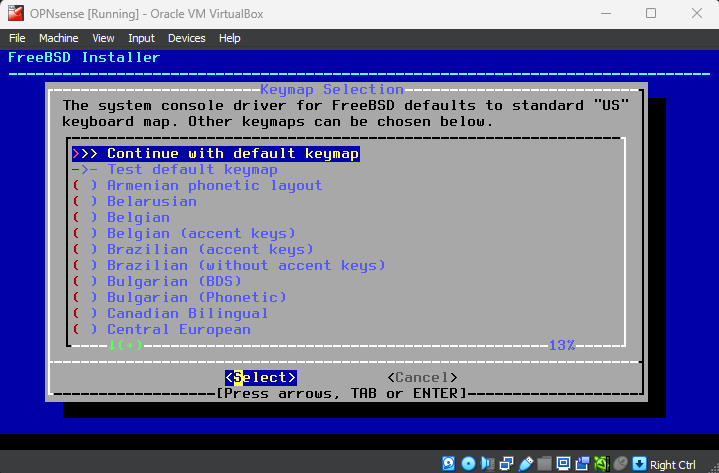
Leave the default keymap (US keyboard)
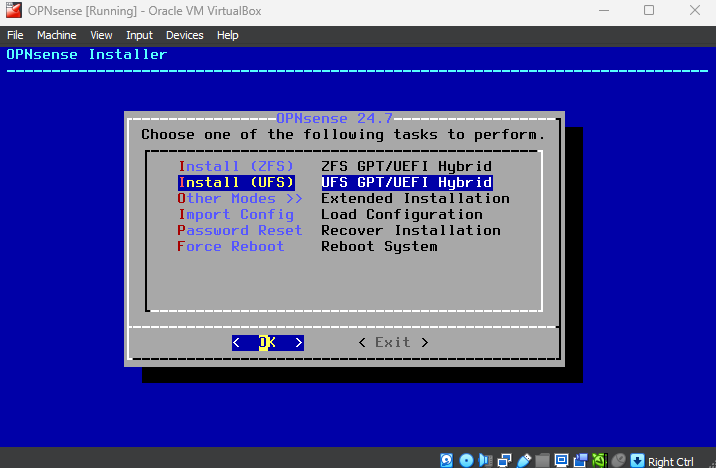
Select Unix file system (UFS)
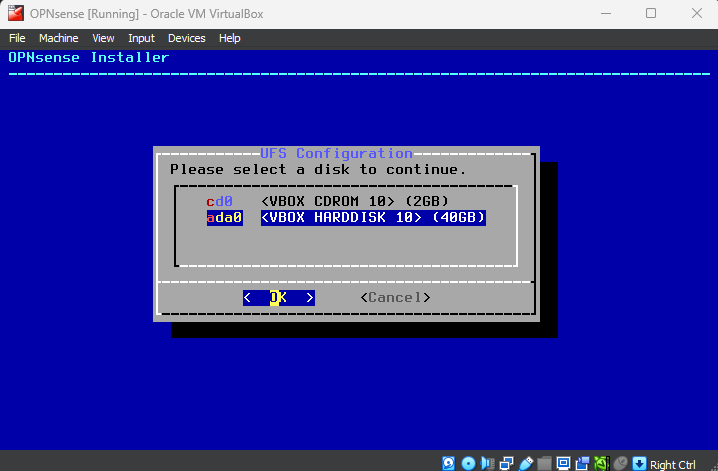
Use the VBox harddisk
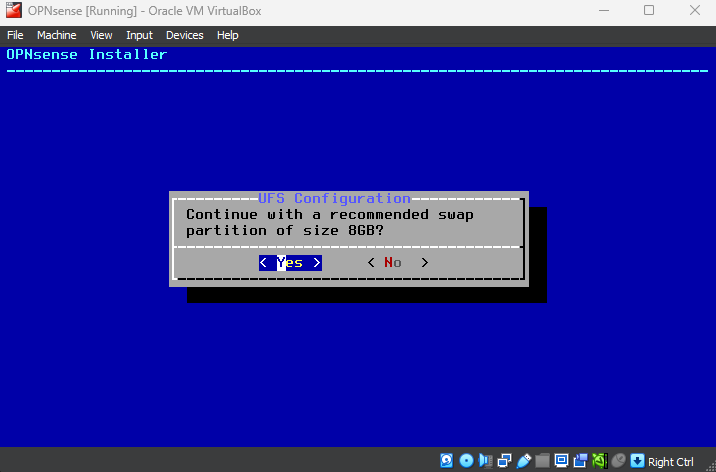
Yes
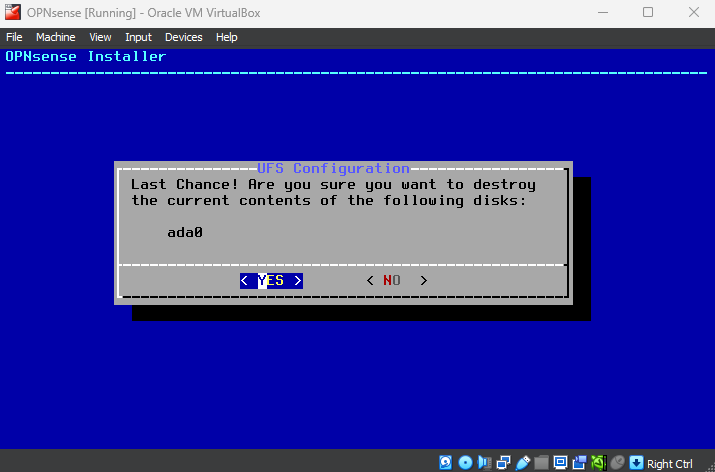
Yes
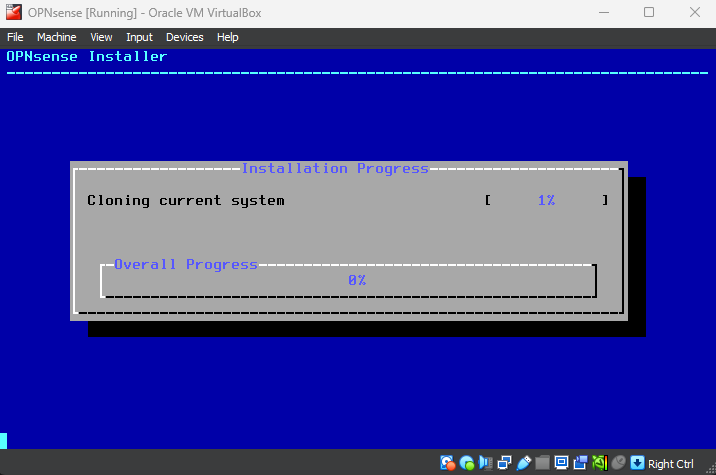
The installation will now begin (should take around 10 minutes)
When the installation is complete, you will be prompted to set up a root password
Set a password and keep note of it, or just leave it at default for now
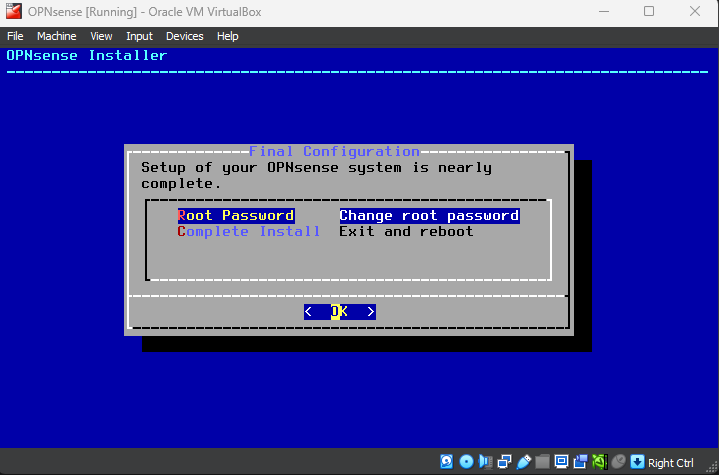
Complete install and reboot
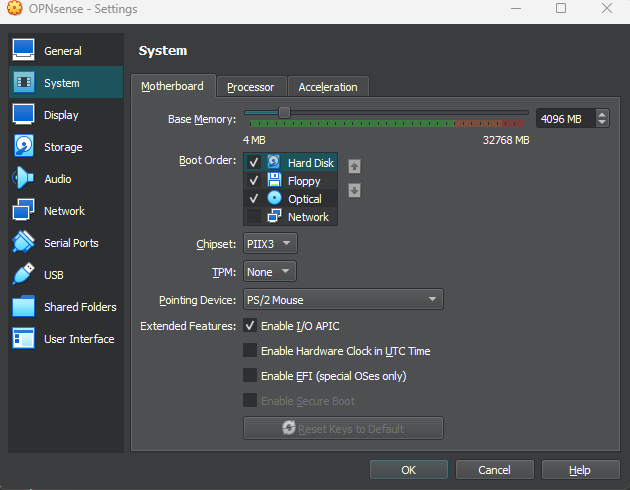
When the screen is black, stop the VM

Right click on the VM > Settings > System
Set the hard disk to be the first on the boot order (so it does not boot from the ISO)
Launch the VM
Login with the credentials:
username: root
password: opnsense (or whatever you set it to)
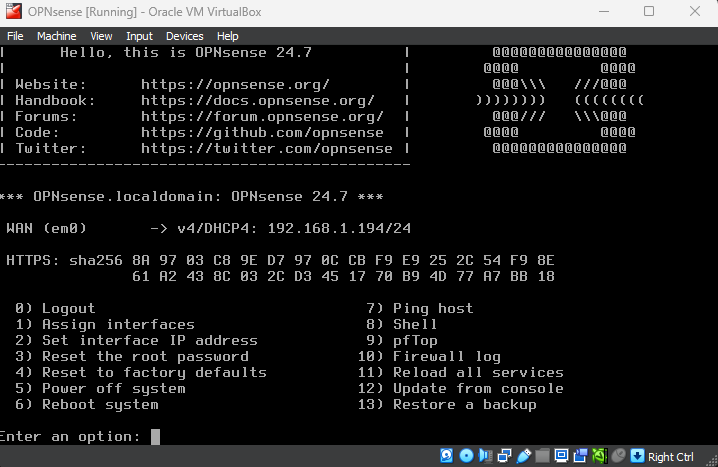
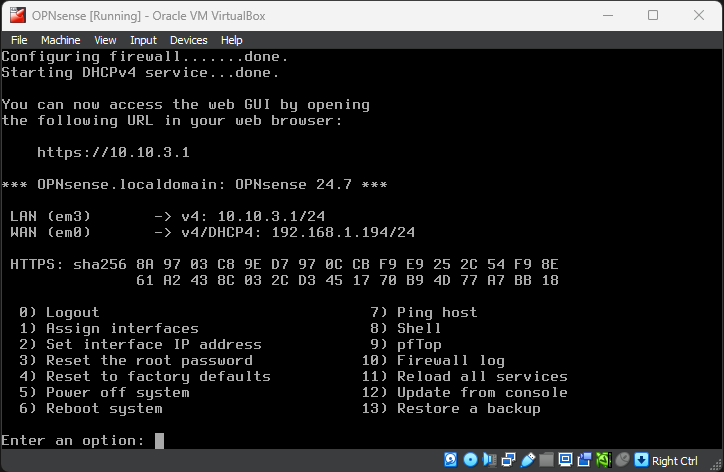
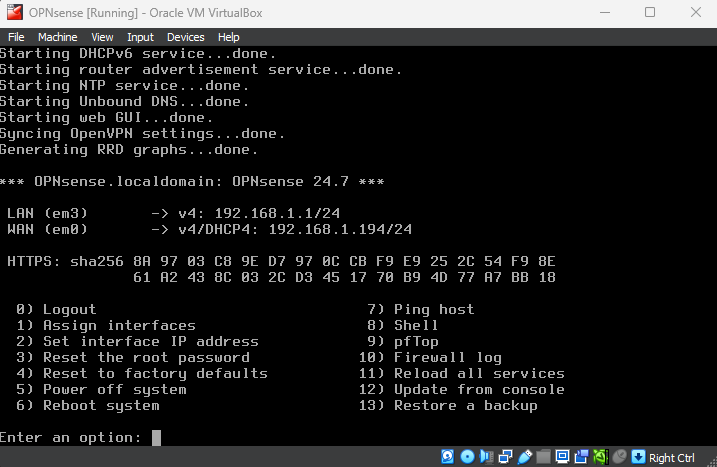
We will now assign the LAN interface so that we can access OPNsense from the web GUI and complete the configurations from there
I will set the LAN interface to the admin LAN (10.10.3.0)
Enter 1 to assign interfaces
em3 corresponds to Adapter 4 (cyberlab-admin)
Proceed
We need to change the IP scheme for the LAN
Enter option 2
Do not configure the IP address via DHCP
Set the LAN address to 10.10.3.1
Set the subnet bit count to 24

Do not configure IPv6
We will enable DHCP for this LAN
Enter a DHCP scope (10.10.3.10 - 10.10.3.50 in my case)
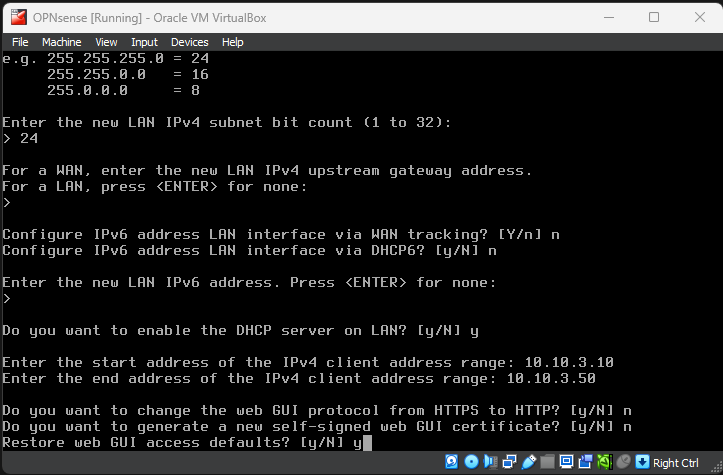
The IP assignments should look like this
We will configure the other interfaces through the web GUI via an Ubuntu VM