Cybersecurity Lab - Initial Network Setup
OPNsense interfaces and routing setup
By the end of this exercise, we will have:
- OPNsense VM set up
- Ubuntu desktop VM set up
- WAN, Prod, AD, and SOC networks configured
- Connectivity between internal networks
- Connectivity between internal networks and home network
- Connectivity between internal networks and the Internet
Network Setup
On VMware Workstation, click Edit > Virtual Network Editor
Click Change Settings (Administrator privileges are required to change network settings)
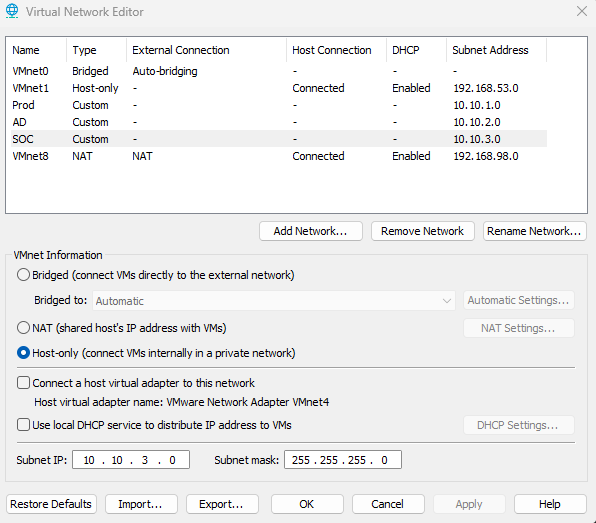
Create the Prod, AD, and SOC networks. These 3 networks share the same settings but have different Subnet Addresses
- VMnet Information: Host-only (connect VMs internally in a private network)
- Uncheck Connect a host virtual adapter to this network and uncheck DHCP service
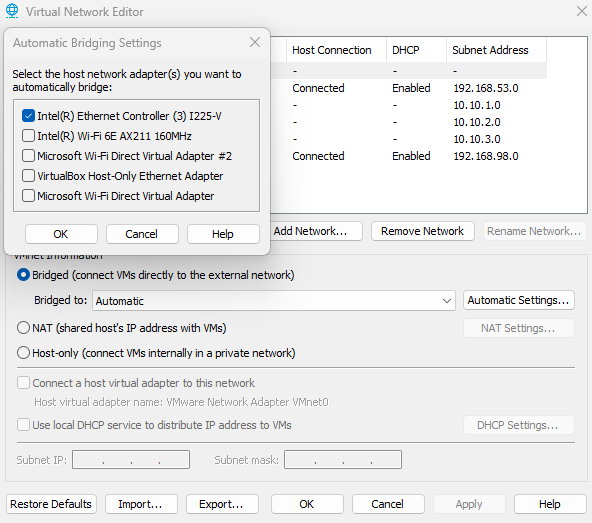
IMPORTANT - For VMnet0 (Bridged Adapter), click Automatic Settings and make sure ONLY the network adapter used by your host PC is checked. I use Interl(R) Ethernet Controller to access the Internet from my host PC, so only that adapter is checked.
The full OPNsense VM setup and installation guide is generally the same from the previous lab. Click here for the guide.
OPNsense VM specs
- 4GB RAM
- 2 CPUS
- 40GB storage
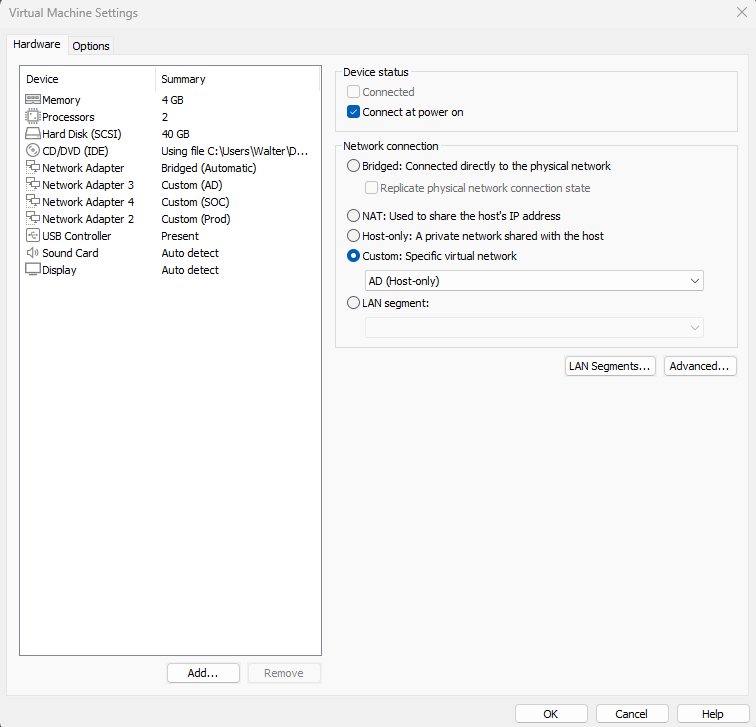
- Network Adapters
- Adapter 1: Bridged (192.168.1.0/24)
- Adapter 2: Prod (10.10.1.0/24)
- Adapter 3: AD (10.10.2.0/24)
- Adapter 4: SOC (10.10.3.0/24)
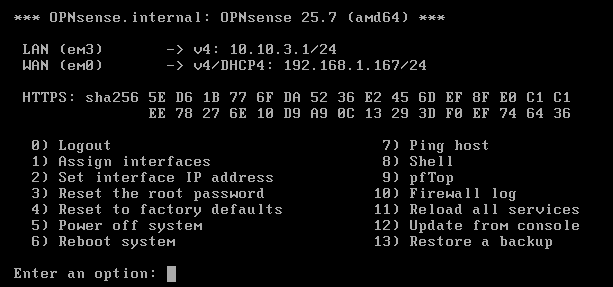
Checkpoint 1 - OPNsense up and running
The WAN and LAN adapters should be configured
The LAN (SOC) adapter (em3)
WAN adapter (em0)
Checkpoint 2 - Ubuntu Desktop Set Up
The Ubuntu desktop VM is fairly simple to setup, however I the installation guide can be found here.
Ubuntu VM specs
- 4GB RAM
- 2 CPUS
- 25GB storage
- Network Adapters
- Adapter 1: SOC (10.10.3.0/24)
Since DHCP is disabled for all networks, we will have to assign an IP to this VM manually.
Run sudo nano /etc/netplan/01-network-manager-all.yaml
Follow the yaml format below
I gave this VM the IP address 10.10.3.11
Make sure to use the SOC network default gateway (10.10.3.1)
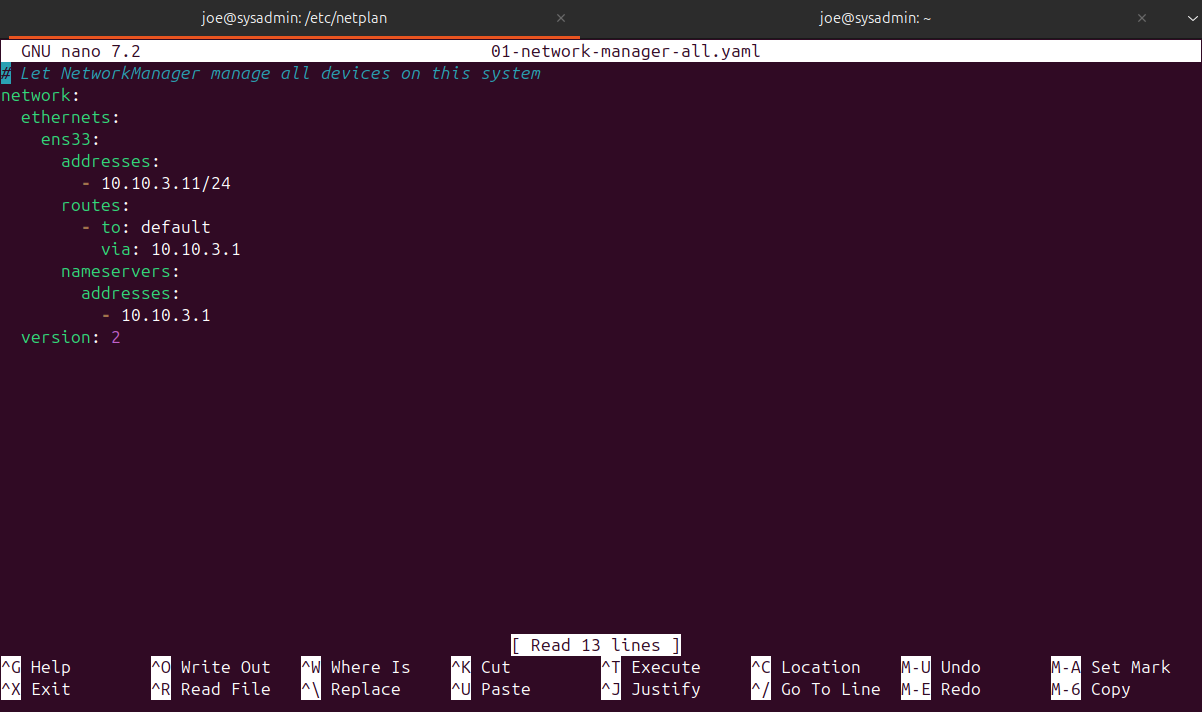
After saving and closing the file, run sudo netplan apply
We should be able to ping the default gateway. We still do not have Internet connectivity.

Network Configuration
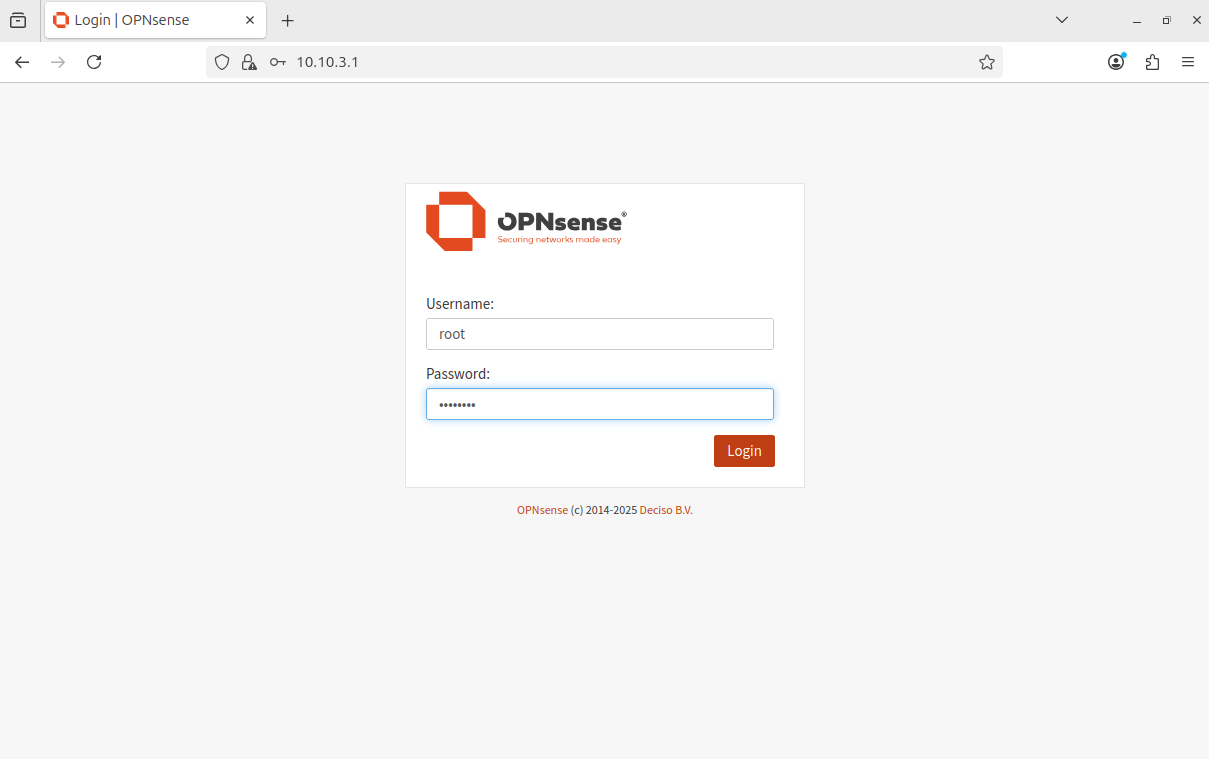
Access the OPNsense web GUI
Default credentials:
- username: root
- password: opnsense
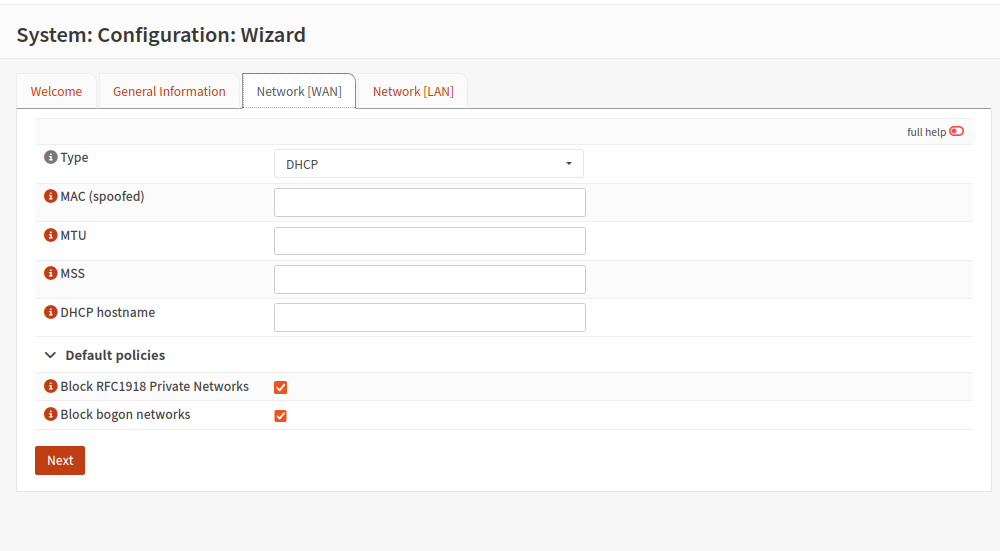
Go through the system configuration wizard
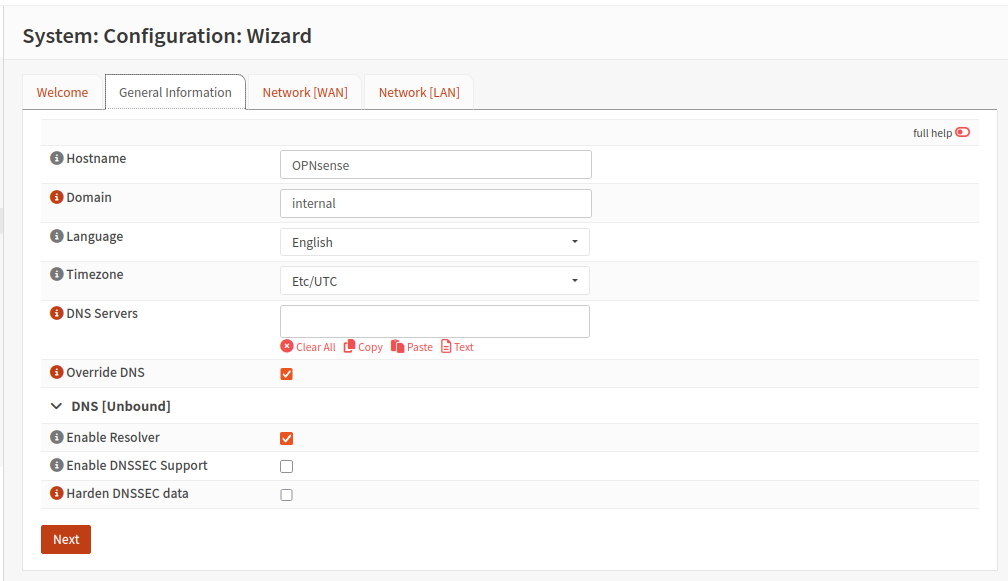
Leave the WAN type to DHCP, keep in mind that OPNsense is getting its WAN IP address from my home router’s DHCP server.
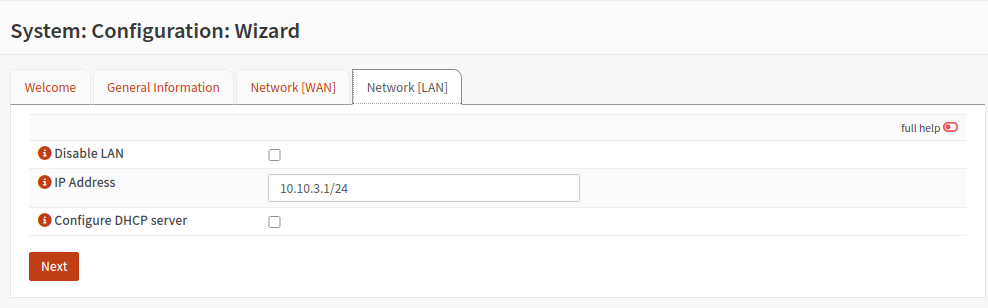
In this case, the LAN is our SOC network (10.10.3.0)
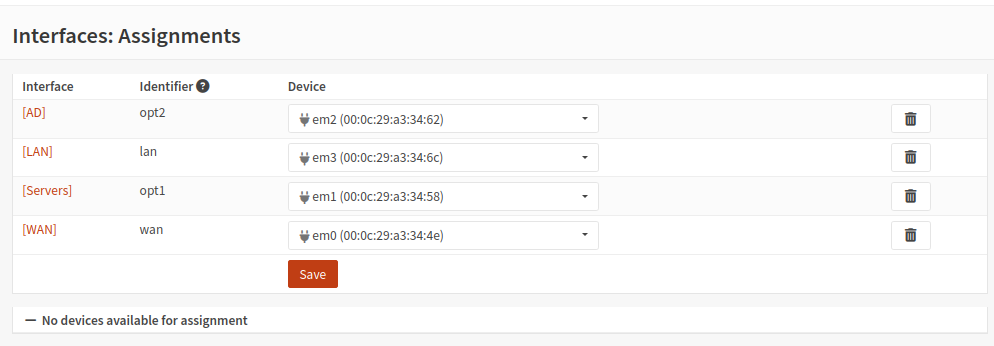
Network Interface Assignment
Assign the interfaces to their respective devices. The order matches the way the OPNsense network adapters are set up. (Adapter 1 (WAN) = em0, Adapter 2 (Prod) = em1, etc.)
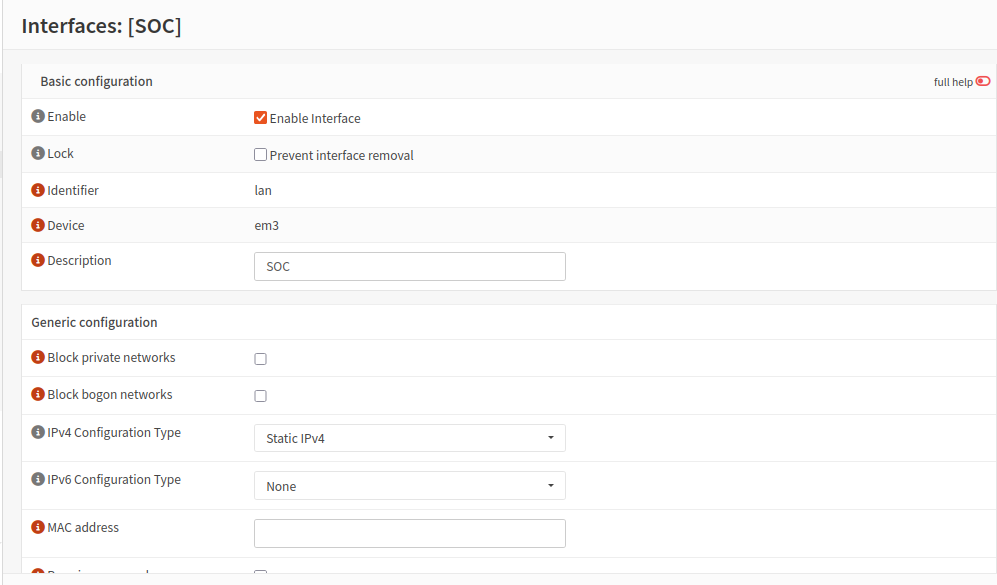
Head to Interfaces > lan
Here, I renamed LAN to SOC for clarity
Head tpo Interfaces > opt1
This is our Prod network
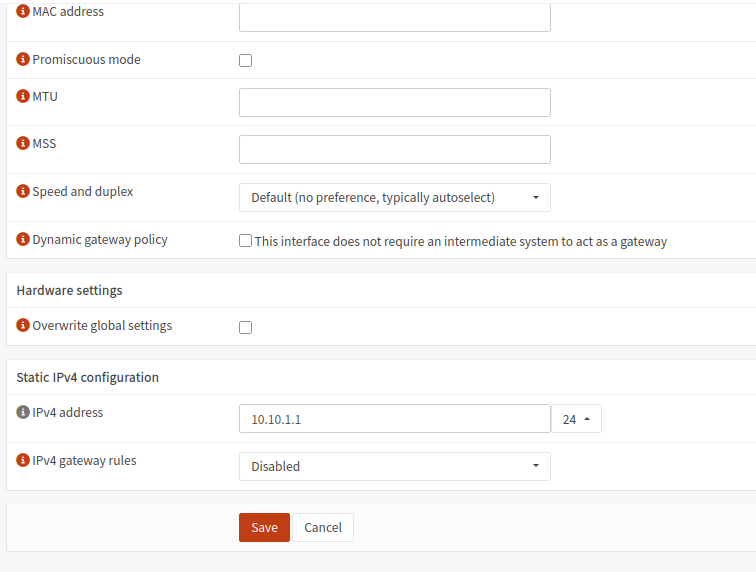
I renamed this interface to Servers and checked Enable
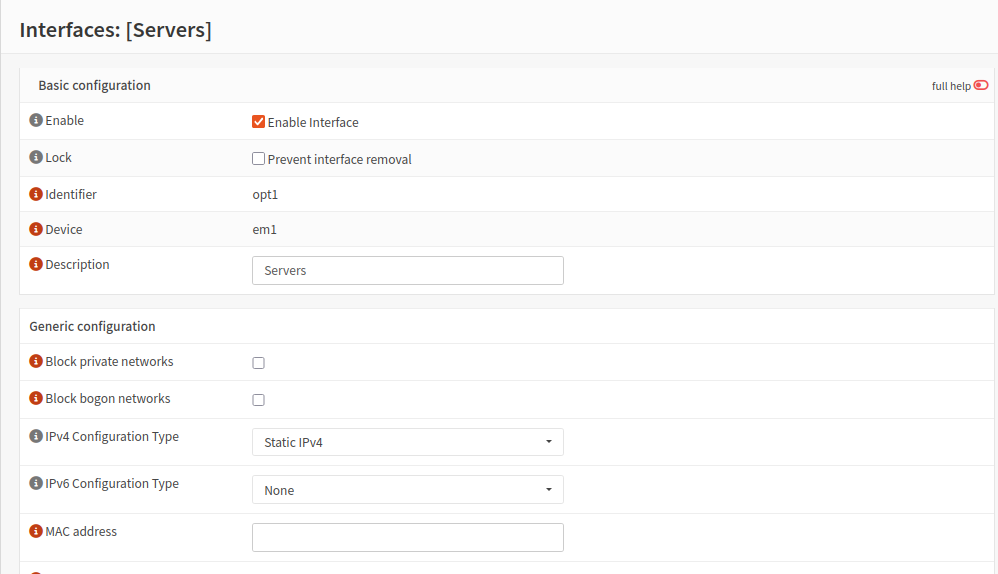
Set the static IPv4 address to 10.10.1.1/24. I am not using IPv6 for this lab
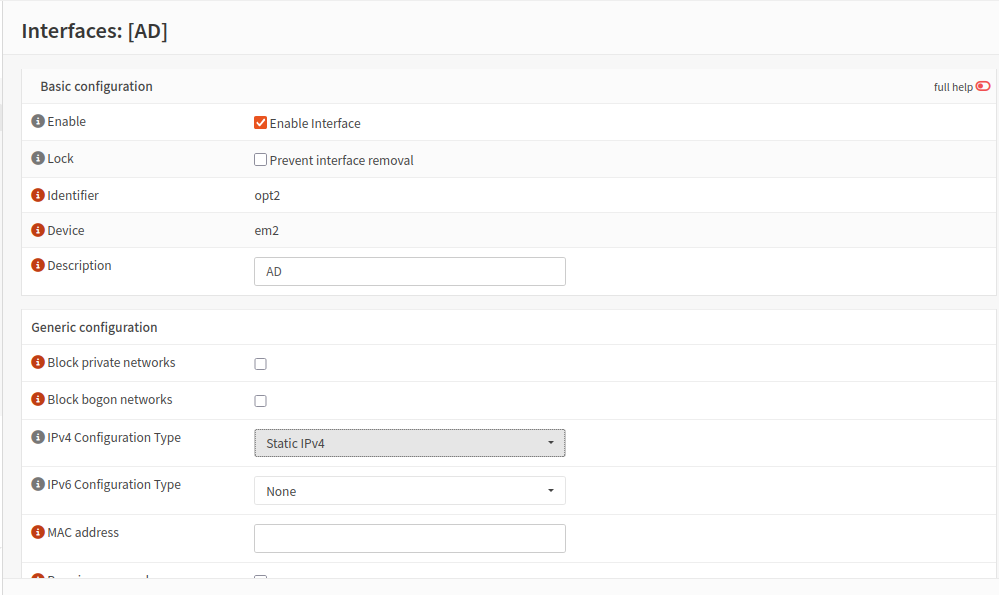
Head to Interfaces > opt2
This is our AD network. Check enable interface and set IPv4 configuration type to static. Again, I am not using IPv6 for this lab.
Give this network the IPv4 address 10.10.2.1/24
Interface Overview
Make sure each interface has the correct IP address according to the topology.

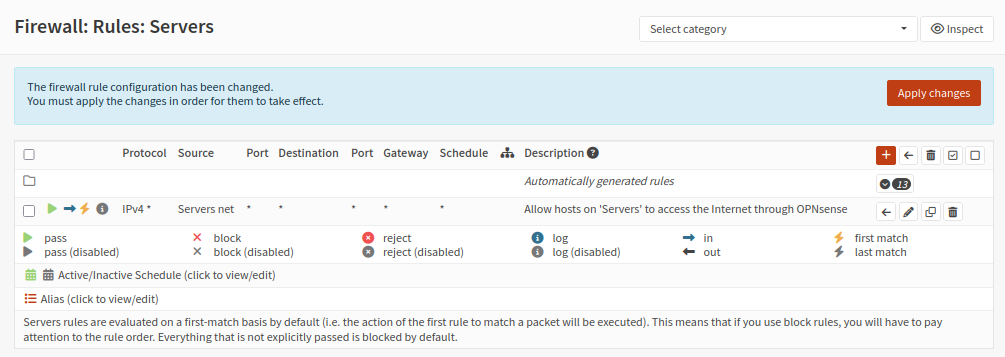
Firewall Rules
We will need to configure some firewall rules so our internal VMs can access the Internet through our OPNsense VM. The firewall rules are purposefully open for this phase of the lab.
Head to Firewall > Rules > Servers
Add a new rule:
Action: Pass
Interface: Servers
Direction: in
TCP/IP Version: IPv4
Protocol: any
Source: Servers net
Destination: any
Description: Allow hosts on ‘Servers’ to access the Internet through OPNsense.
Follow the same process for the AD and SOC networks
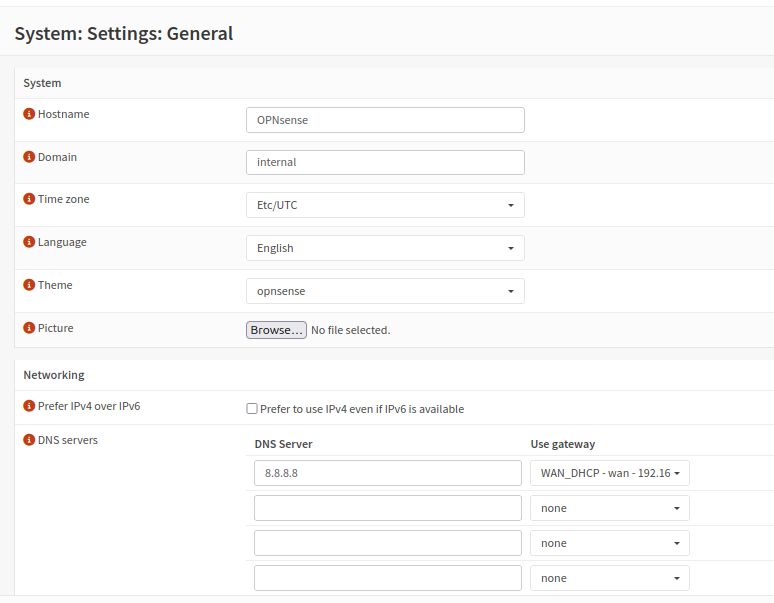
DNS
Head to System > Settings > General
Under Networking, enter your DNS server of choice. I chose 8.8.8.8
Next to DNS servers, select the WAN_DHCP gateway
Final Test
We should be able to reach the Internet from our internal VMs.
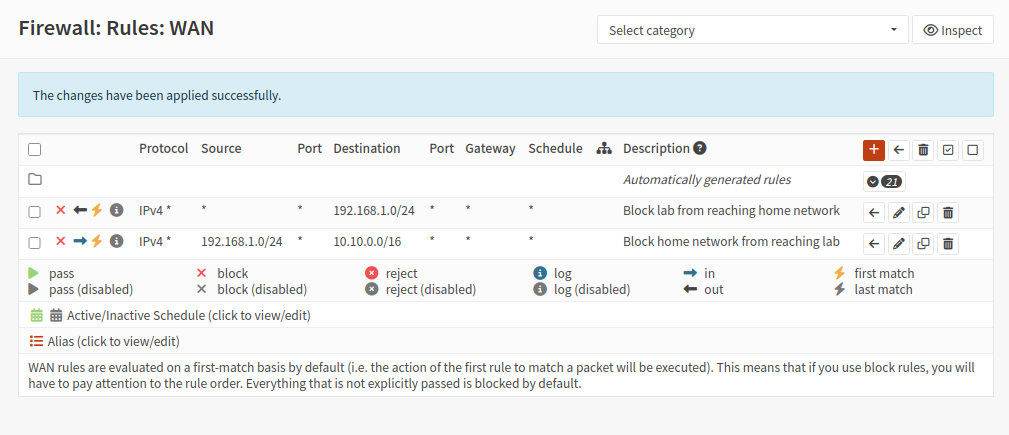
Optional Hardening
If you do not want your lab VMs to be visible to your home network and vice versa, you will need to create firewall rules on the WAN interface. However, for my lab, my home network will be considered an untrusted network. Kali Linux will sit on my home network to simulate an outside attacker, so these rules are not necessary for me.
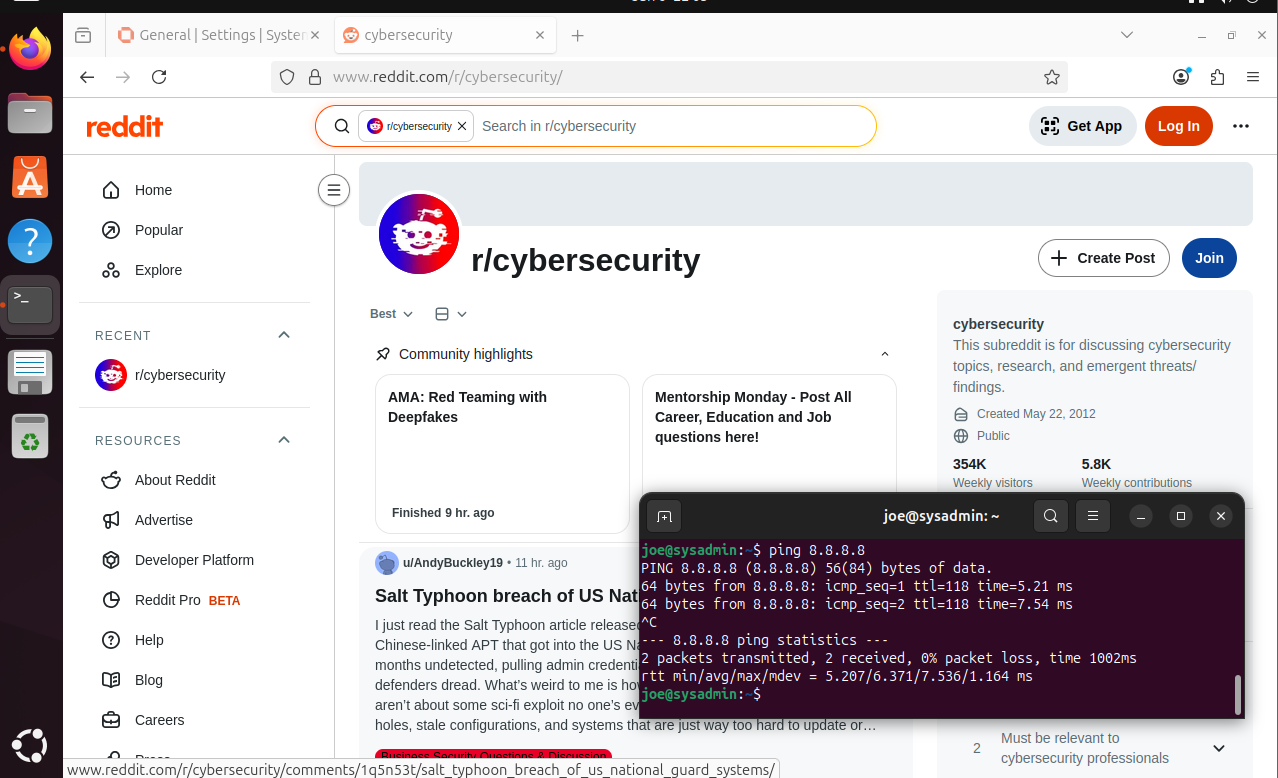
Testing
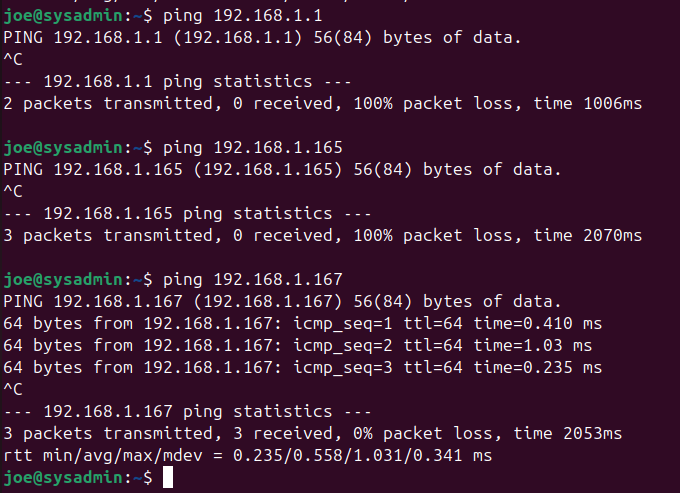
Notice after applying the rules, I cannot ping my home router nor my host machine, however I can ping OPNsense’s WAN address.
Internal lab hosts can reach the perimeter firewall but are explicitly prevented from accessing the underlying home LAN.