Cybersecurity Lab - Web App Services Setup
WebServer, MySQL, RabbitMQ, and Data Processor VMs set up + port forwarding rule for the webserver.
By the end of this exercise, we will have:
- Wazuh VM set up
- Wazuh agents deployed on both Windows machines and the Ubuntu VM
DMZ Network Setup
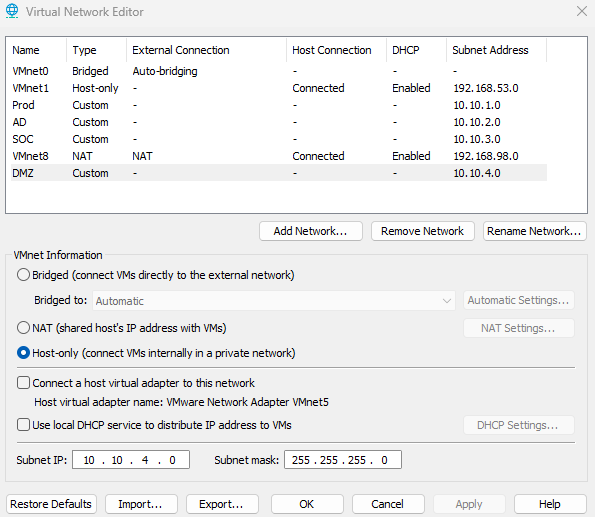
On VMware Workstation, click Edit > Virtual Network Editor
Click Change Settings (administrator privileges are required to change network settings)
Create the DMZ network. Give the network the address 10.10.4.0.
- VMnet Information: Host-only (connect VMs internally in a private network)
- Uncheck Connect a host virtual adapter to this network and uncheck DHCP service
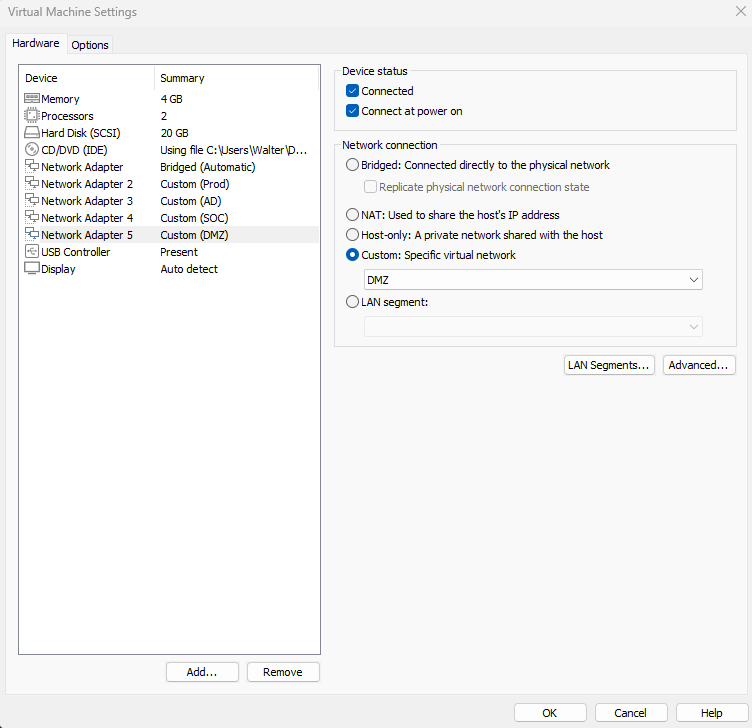
Shut off the OPNsense VM if it is running, and add a new network adapter to the OPNsense VM. Set it to the newly created DMZ network. This will be its 5th adapter, so we should see em4 on the web interface.
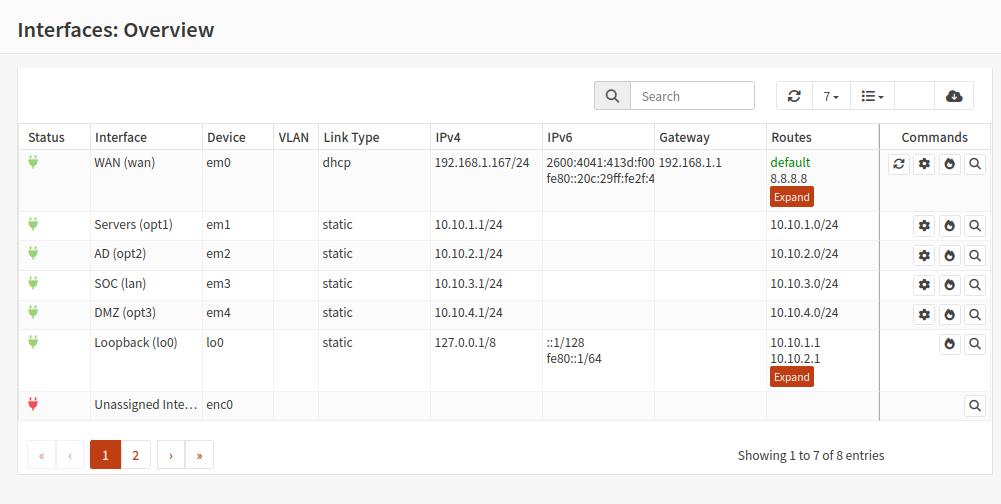
Assign em4 to opt3. Rename this interface to DMZ and assign it the network address 10.10.4.0/24. Follow the steps from Network Setup if you are unsure how to do this.
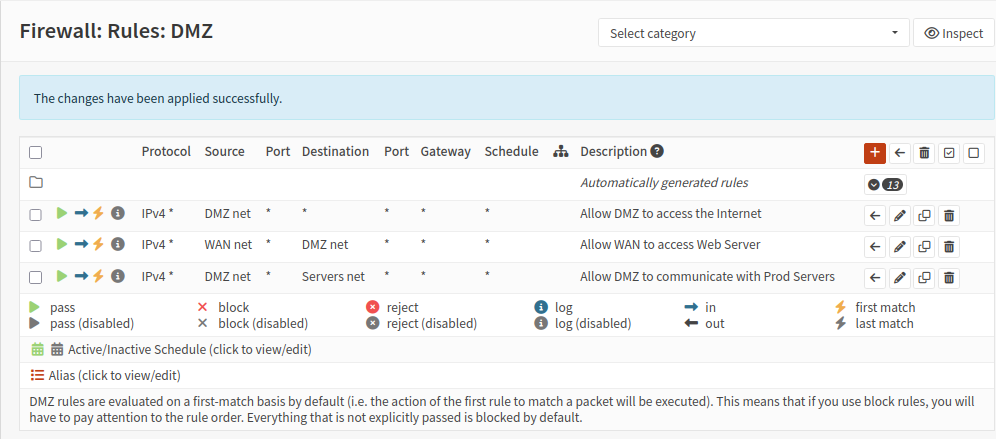
DMZ Firewall Rules
Head to Firewall > Rules > DMZ
I am purposefully using open firewall rules for the sake of testing.
These are the rules:
- DMZ net → Any (allow DMZ to access the open Internet)
- WAN net → DMZ net (my home network will be able to reach the DMZ via port forwarding, this will be configured later)
- DMZ net → Servers net (DMZ needs to communicate with MySQL, RabbitMQ, and data processor VMs)
App Services Setup
This is mainly for my own reference, but feel free to follow along.
If you are interested, this is the code for the app: https://github.com/walterg7/systems-integration
For now, all the services will run on separate Ubuntu server VMs. Ubuntu Server VM installation guide
Web Server VM + Apache Setup
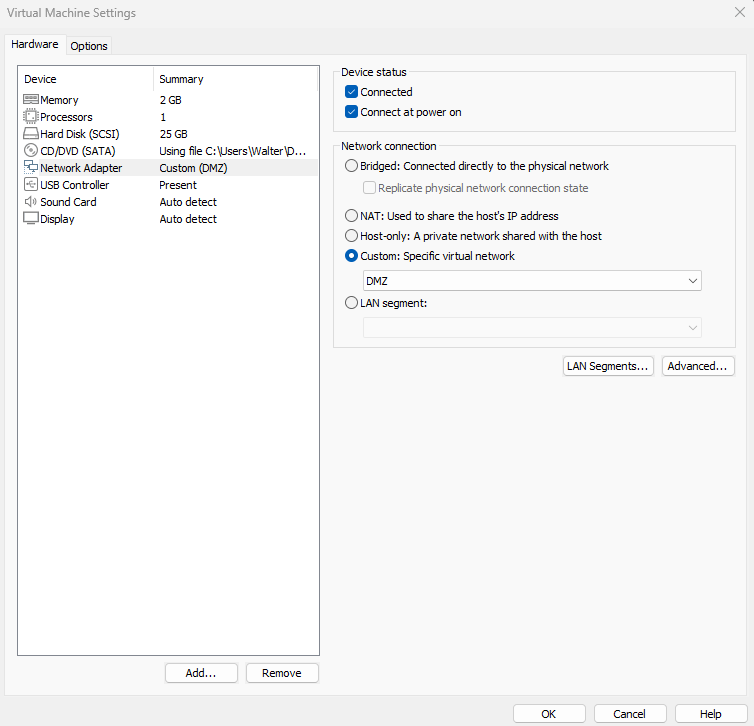
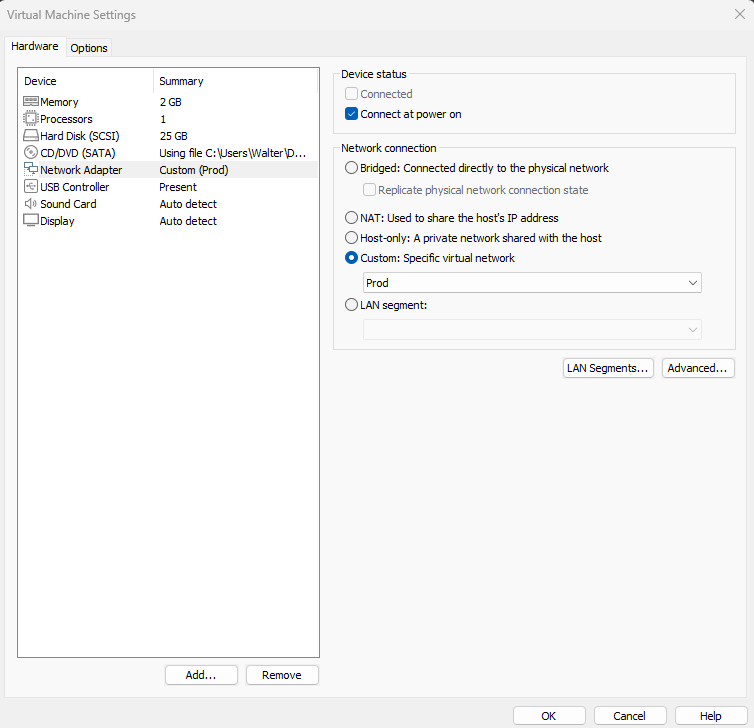
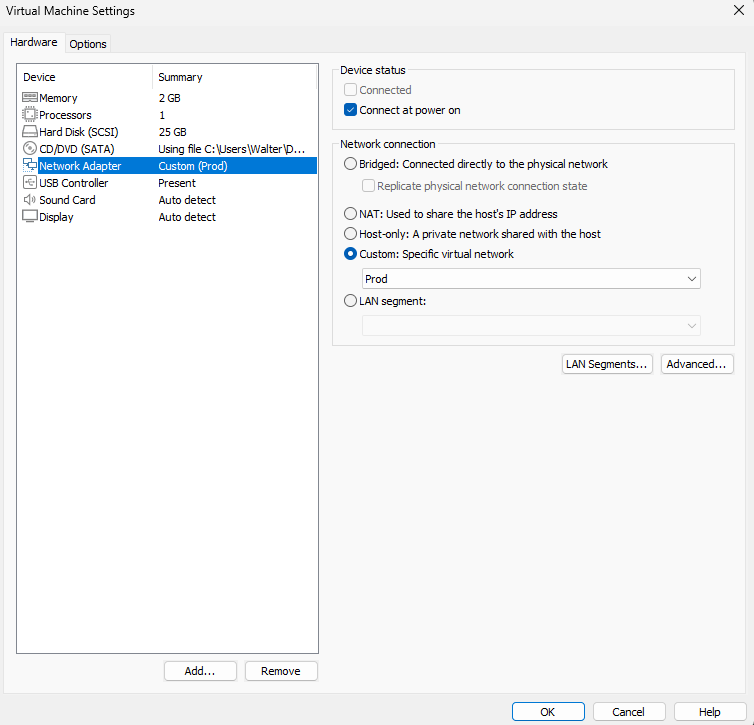
I gave this VM 2GB of RAM, 1 Processor and 25GB storage. This VM is only connected to the DMZ network.
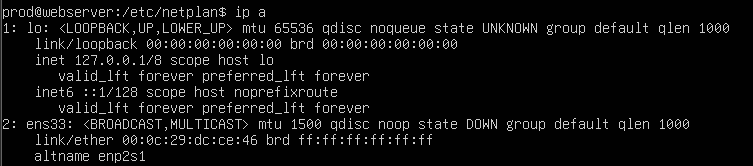
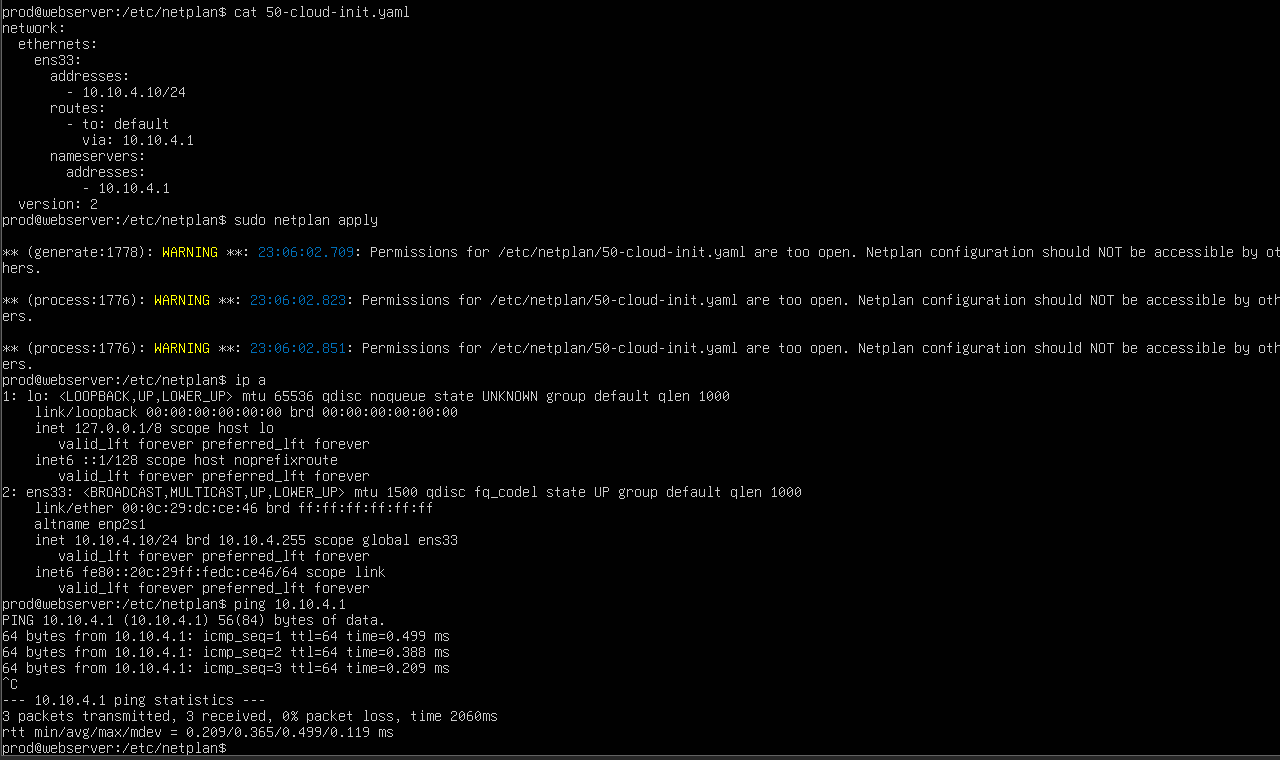
When first booting the Ubuntu server VM, it will not have an IP. Edit the network config file at /etc/netplan/50-cloud-init.yaml
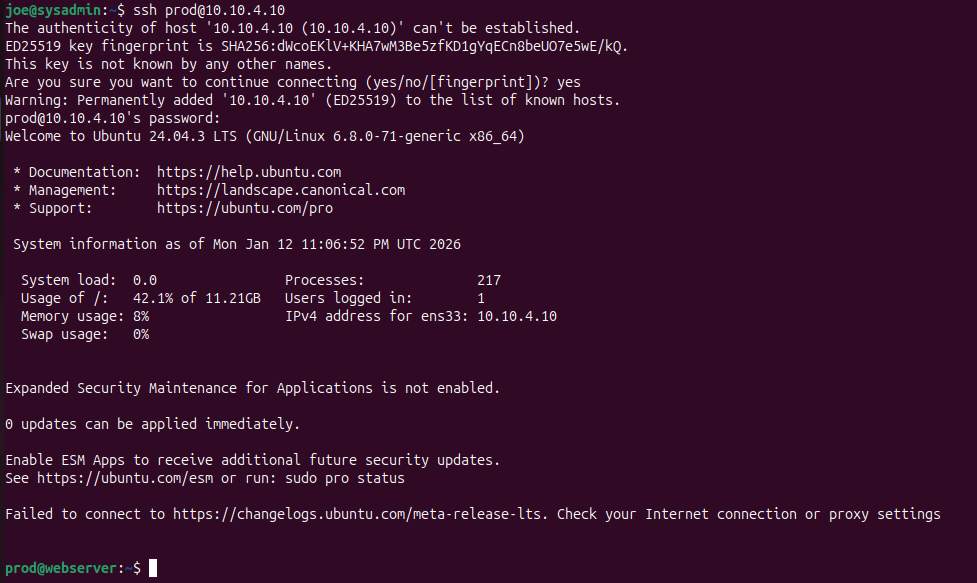
Follow this YAML format for the network configuration. I gave this VM the IP address 10.10.4.10. Run some ping tests to make sure connectivity works.
After giving the Web Server VM an IP, I SSH’d into it from my Ubuntu desktop VM.
The Web Server VM will need the following packages:
- apache2
- git
- php
- php-amqp
- php-amqplib
- composer
First, clone the repository. The repository directory will be /home/prod/systems-integration
Copy WebServer/001-webserver.conf into /etc/apache2/sites-available

Copy the WebServer, RabbitMQ, Logger, and vendor directories into /var/www

I symlinked /var/www/WebServer with /home/prod/systems-integration .

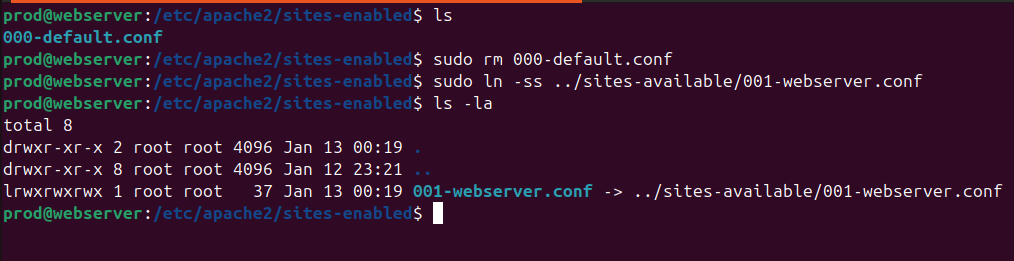
Head to /etc/apache2/sites-enabled. Delete the default config (000-default.conf) and add a symlink to our config (001-webserver.conf)
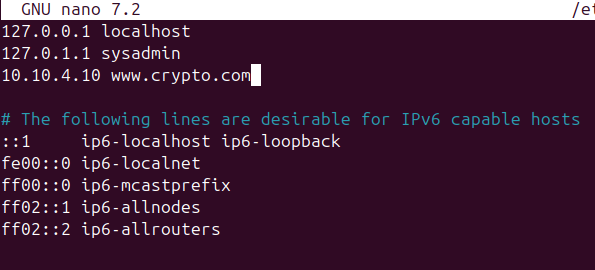
Optional: edit /etc/hosts on the Ubuntu VM add an entry for www.crypto.com, mapping it to the IP address of the Web Server VM.
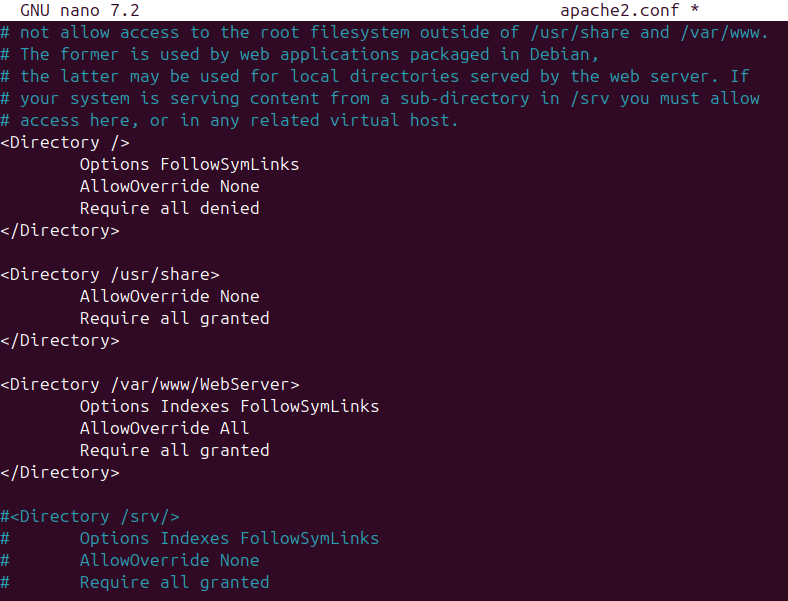
Edit /etc/apache2/apache2.conf
Make sure Directory points to /var/www/WebServer
Finally, run sudo service apache2 reload on the Web Server VM.
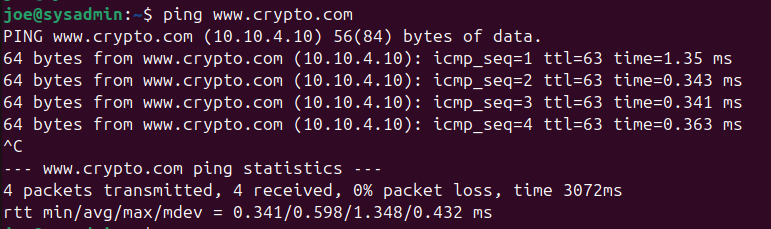
Notice that when I ping www.crypto.com, it resolves the domain name to the Web Server VM.
Open Firefox and clear the cache and cookies.
We should now see our custom site. If not, we may have to restart our VM.

RabbitMQ VM
VM Settings:
Once you created a new Ubuntu server VM and assigned it an IP address, install the following via apt
- git
- php
- php-amqp
- php-amqplib
- rabbitmq-server
Again, make sure to clone the repository.
Run sudo rabbitmq-plugins enable rabbitmq_management
RabbitMQ Setup
Create a new admin user by running the following commands:
sudo rabbitmqctl add_user rbmq-admin admin
sudo rabbitmqctl set_user_tages rbmq-admin administrator
sudo rabbitmqctl set_permissions -p / rbmq-admin “.*” “.*” “.*”
These commands create an admin user rbmq-admin that has the password admin, with the administrator tags and permissions on all virtual hosts.

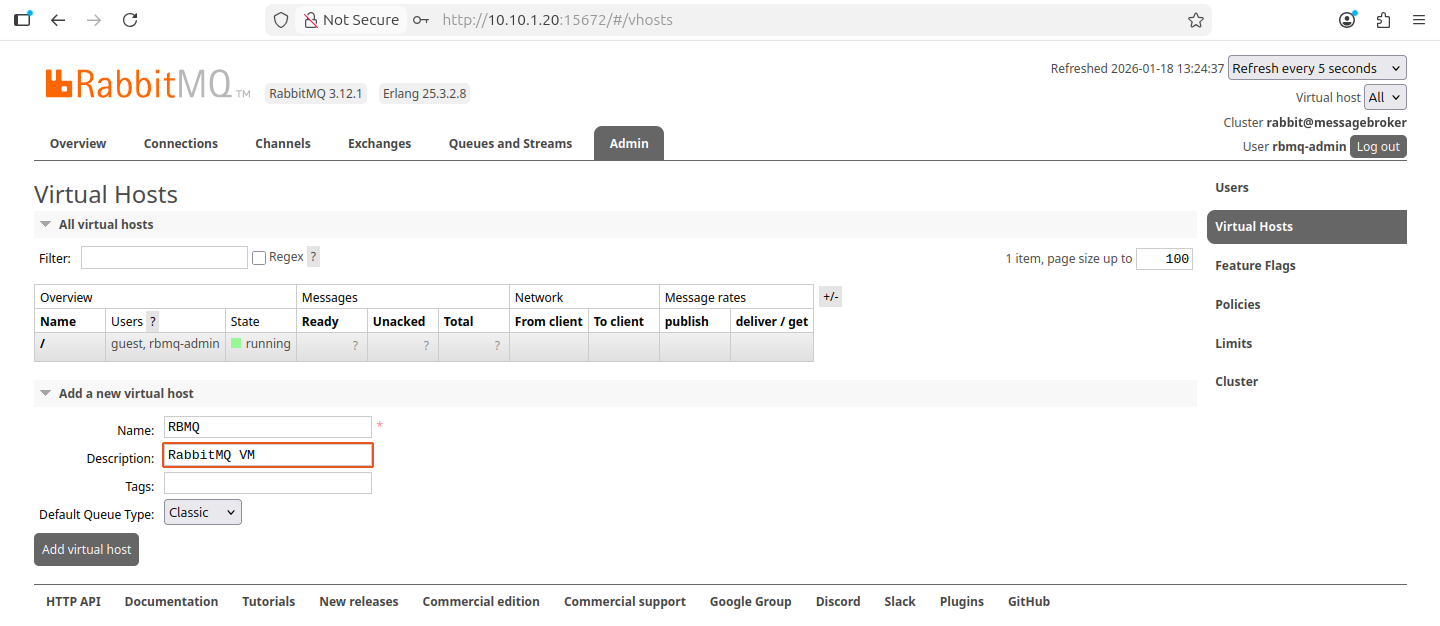
Head to the RabbitMQ web interface at 10.10.1.20:15672
Log in with the new credentials.
Create a new virtual host.
Exchanges Setup
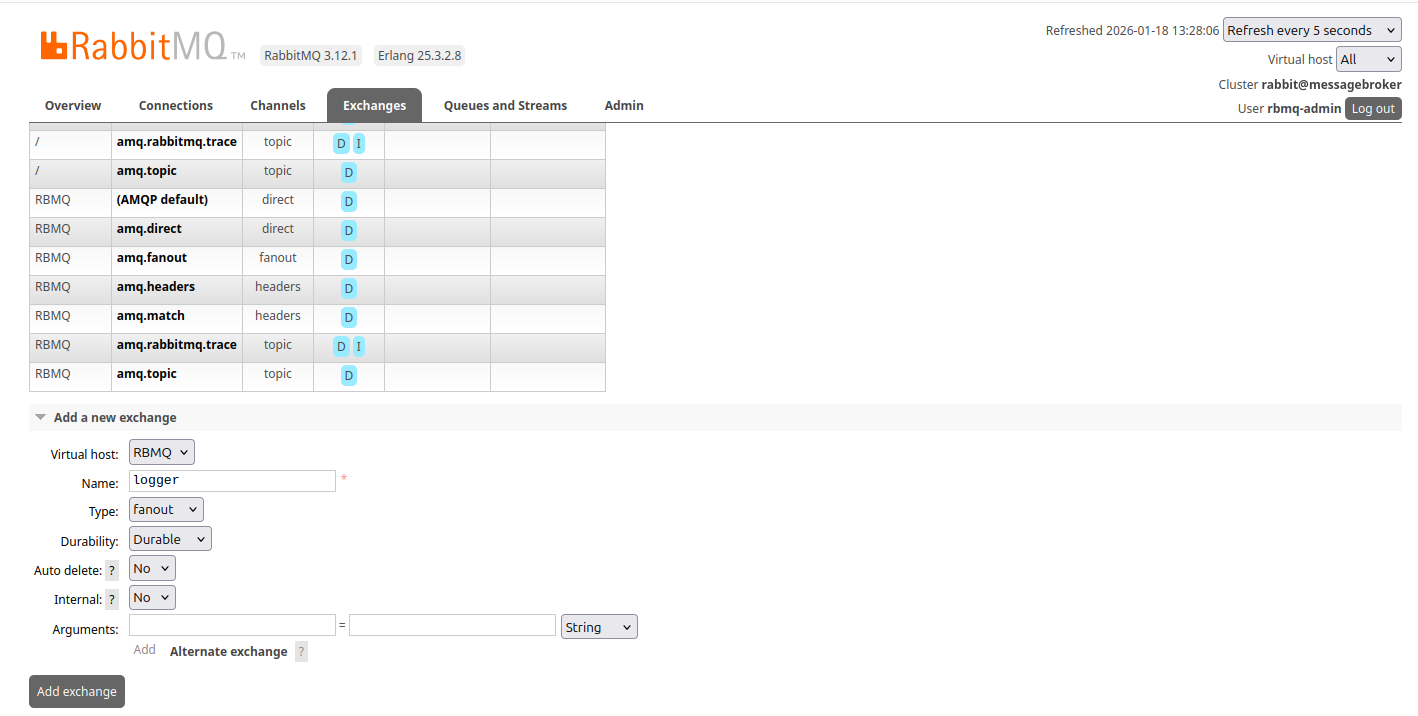
Create an exchange
i am going to create the logger exchange first to test that the VMs can communicate with each other via RabbitMQ. Make sure to setup the database and dmz exchanges as well.
On the top right hand side drop down menu, change the vhost to RBMQ
Head to Exchanges
The logger exchange must be set to fanout
Leave durability to durable
Create
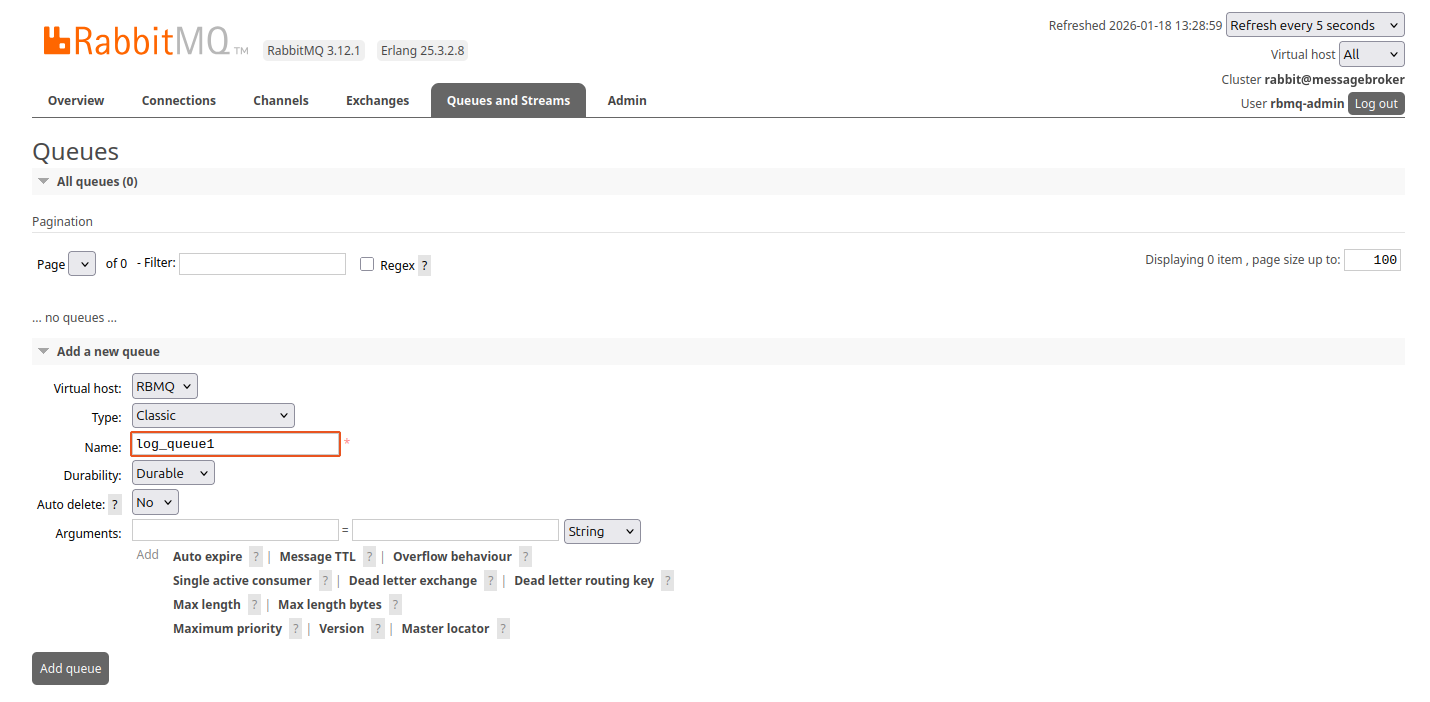
Head to Queues and Streams
Create a queue. I set the type to Classic and durability to Durable.
Click on the new queue
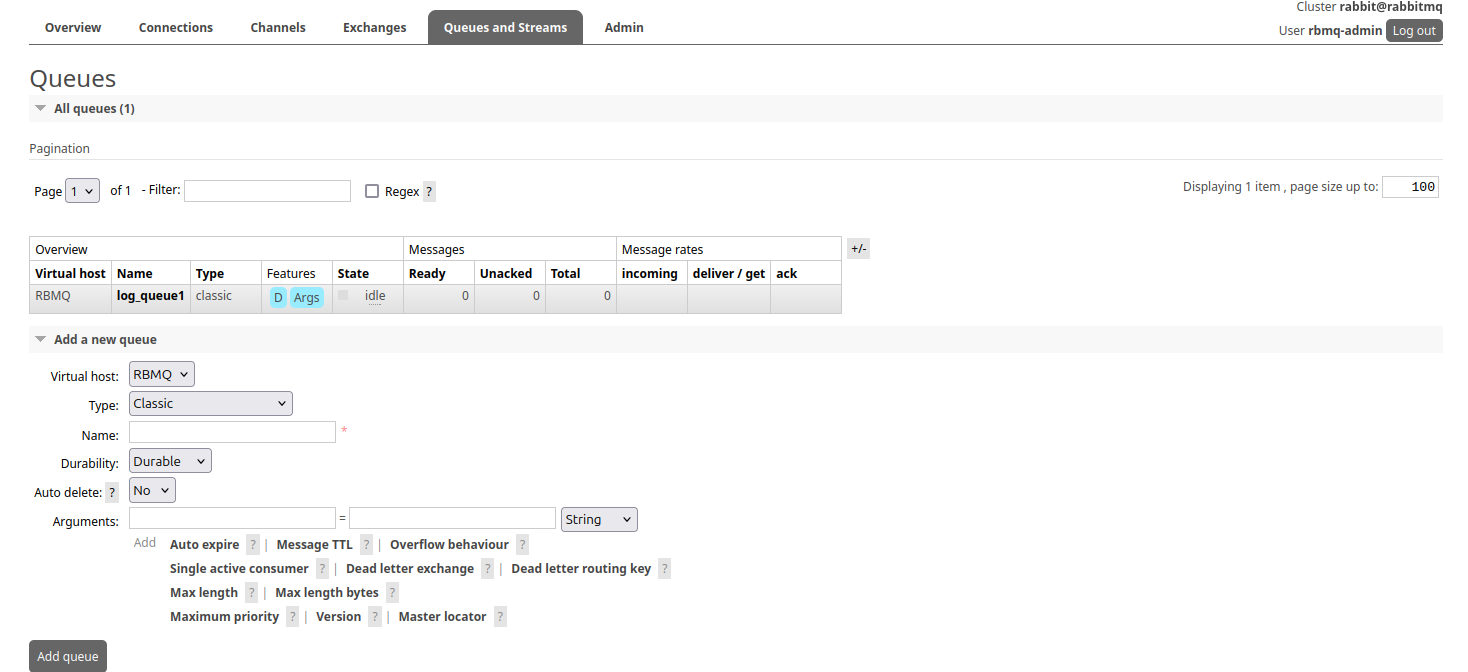
Scroll down
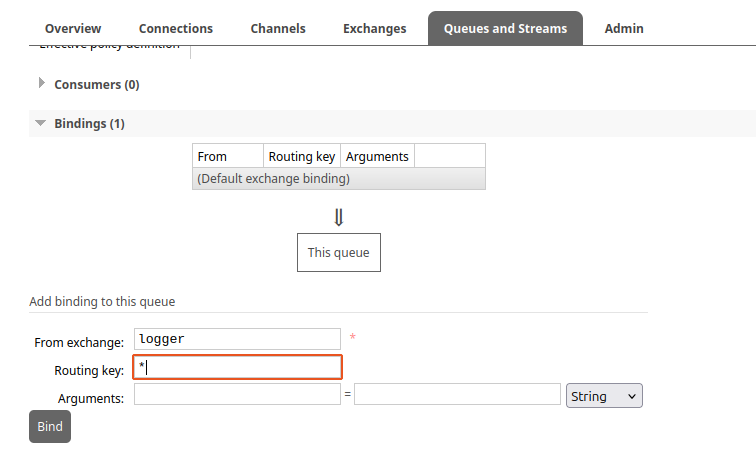
Under bindings, bind the queue to the logger exchange using the routing key *
MySQL VM
VM settings:
Once you created a new Ubuntu server VM and assigned it an IP address, install the following via apt:
- git
- php
- php-amqp
- php-amqplib
- php-mysql
- mysql-server
Once again, make sure to clone the repository.
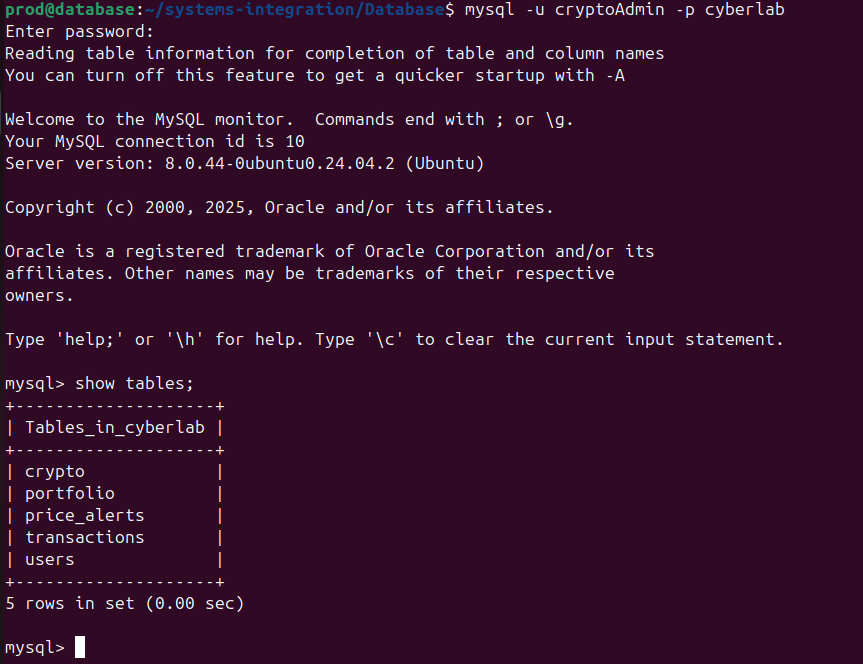
Use MySQL from the command line: sudo mysql
Run the following commands to create a new database and user:
1
2
3
4
5
6
7
8
9
10
--create db and user
create database cyberlab;

--user (WARNING: make sure you are using straight single quotes: ')
create user 'cryptoAdmin'@localhost identified by 'admin';

--giving privs
grant all privileges on cyberlab.* to 'cryptoAdmin'@localhost;

flush privileges;
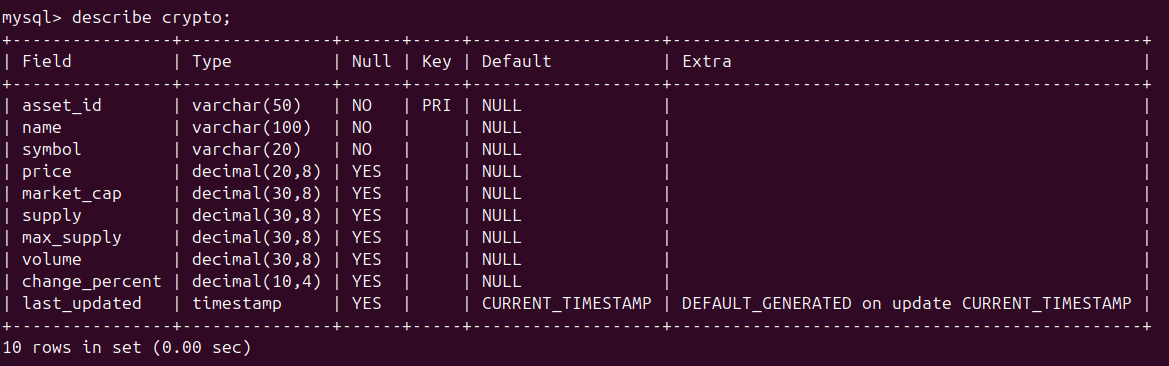
Run the database schema setup command

Log in as the new user and check out the new DB.
The crypto table needs to be populated via the API.
Datasource Processor VM
VM Settings:
Once you created a new Ubuntu server VM and assigned it an IP address, install the following via apt
- git
- php
- php-amqp
- php-amqplib
- composer
Once again, make sure to clone the repository.
Before running any scripts, make sure RabbitMQ.ini is using the correct configurations (on all VMs).
From the Data processor VM, run the dmz_handler script.
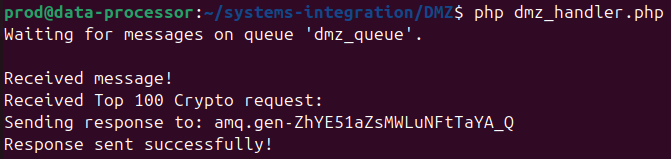
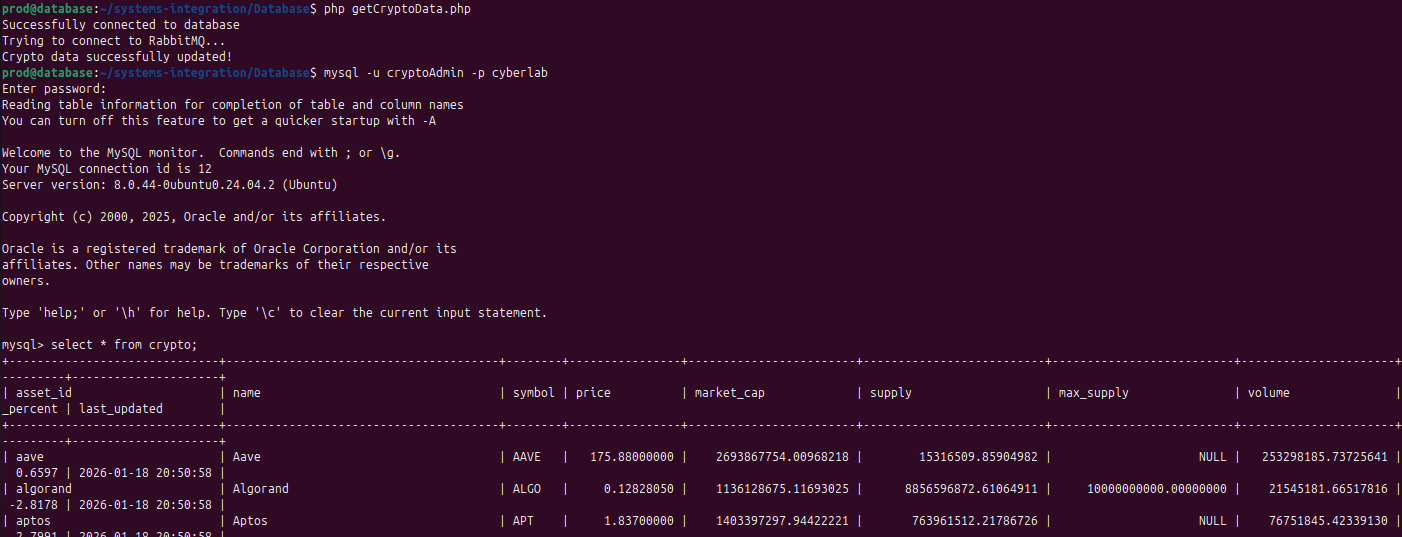
On the MySQL VM, run the getCryptoData script.
Check the crypto table, it should now be populated.
User Registration working

User info added to DB

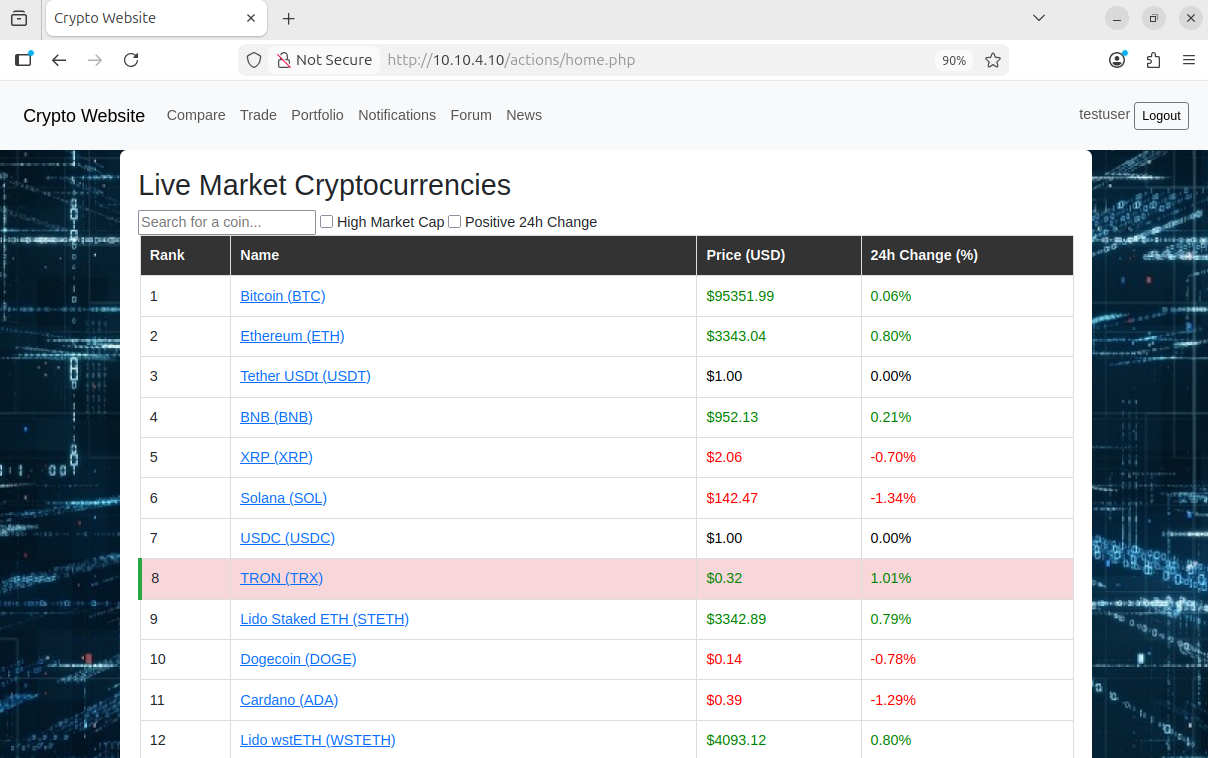
Now the web app is fully functional.
Port Forwarding
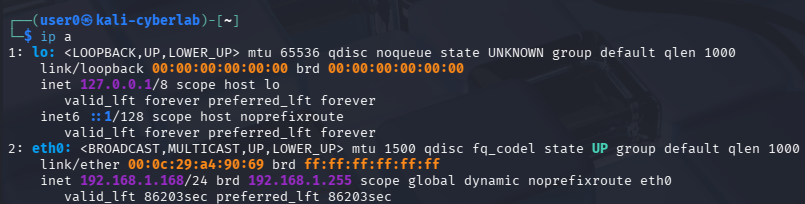
Create a Kali Linux VM. Make sure it is sitting at the 192.168.1.0/24 network. Kali Linux VM installation guide
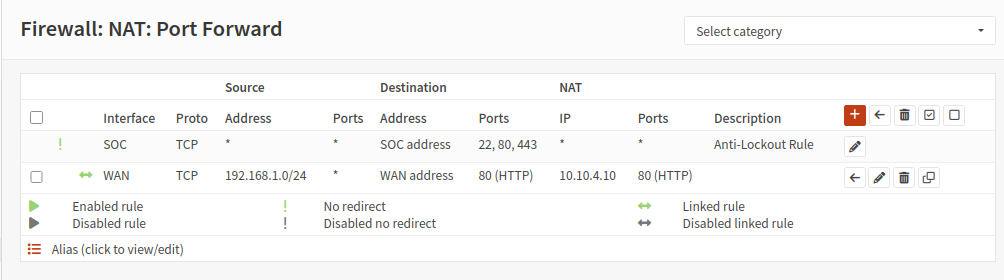
Keep in mind that devices on the home network can communicate with the OPNsense VM solely because it is placed on the same network (192.168.1.0/24). Hosts on the home network cannot directly reach the WebServer using its IP address 10.10.4.10, so we must redirect the traffic from OPNsense to the WebServer via port forwarding.
Head to Firewall > NAT > Port Forward
Create new rule
Interface: WAN
TCP/IP Version: IPv4
Protocol: TCP
Source: 192.168.1.0/24
Source port range: any
Destination: WAN address
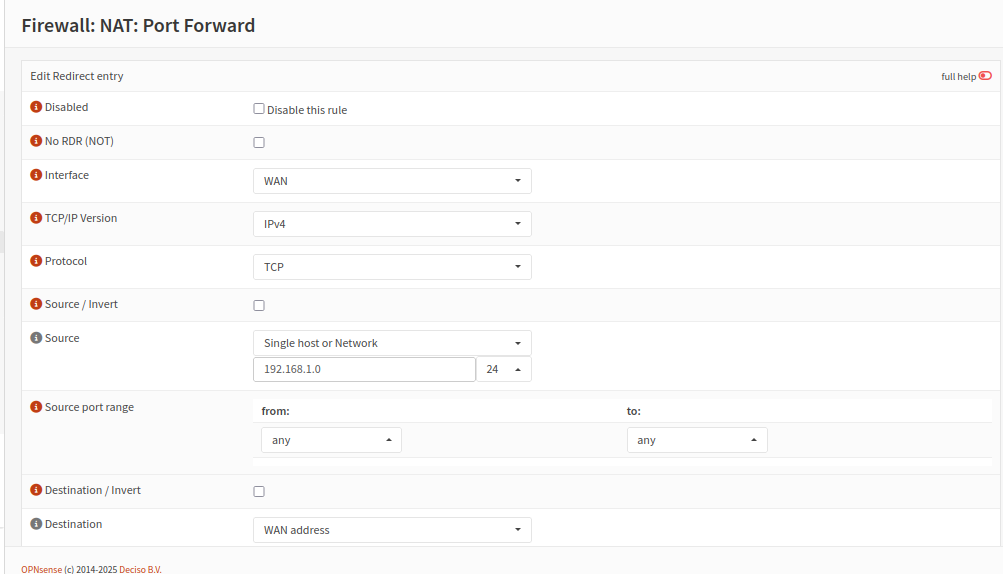
Destination port range: HTTP
Redirect target IP: 10.10.4.10
Redirect target port: HTTP
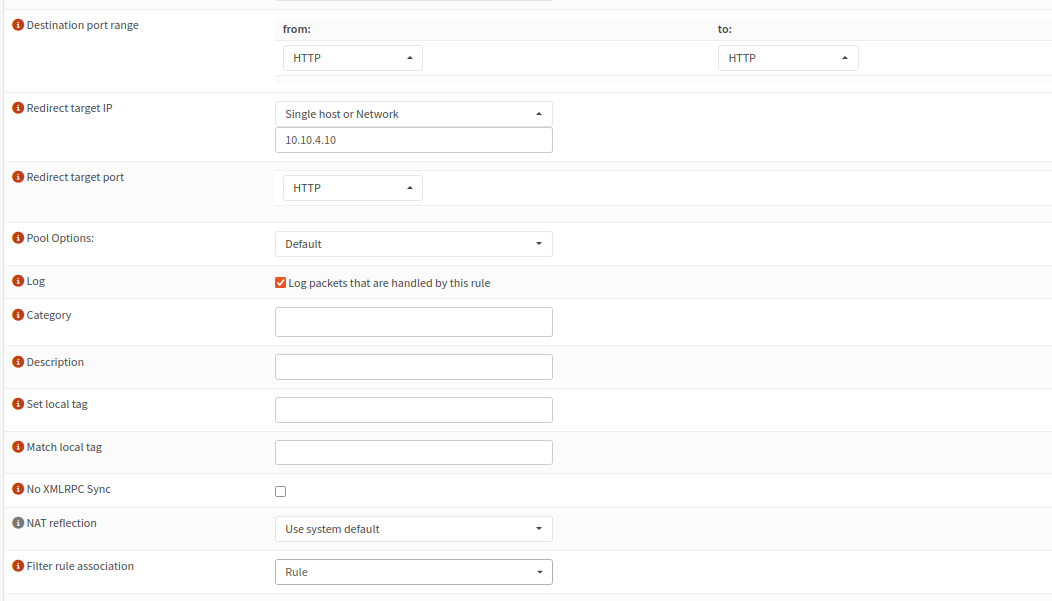
Save and apply
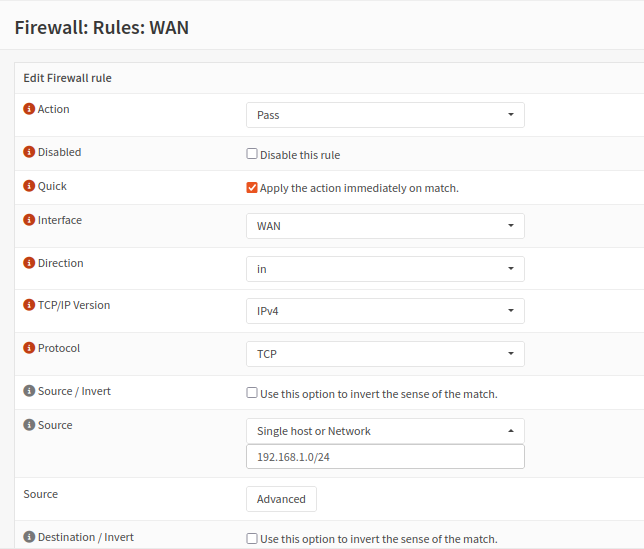
Next, we need a rule that explicitly allows traffic originating from the home network to be passed to the DMZ.
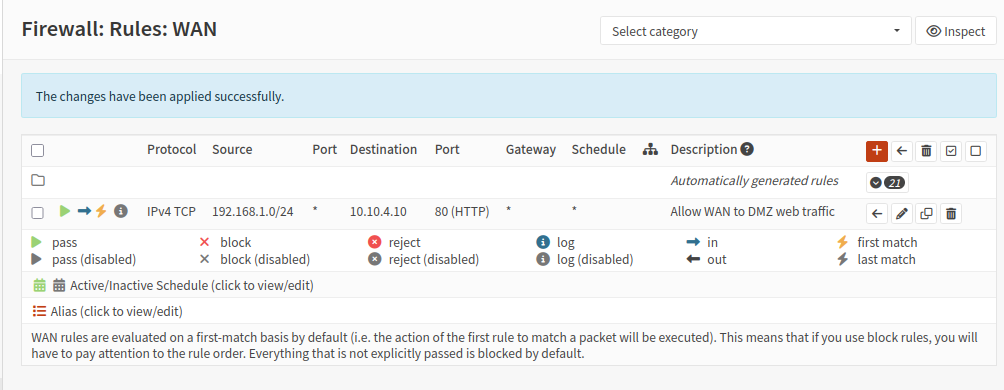
On the OPNsense web interface, head to Firewall > Rules > WAN
Create a new rule
Action: Pass
Interface: WAN
Direction: in
TCP/IP Verion: IPv4
Protocol: TCP
Source: 192.168.1.0/24
Destination: 10.10.4.10
Destination port range: HTTP
Description: Allow WAN to DMZ web traffic
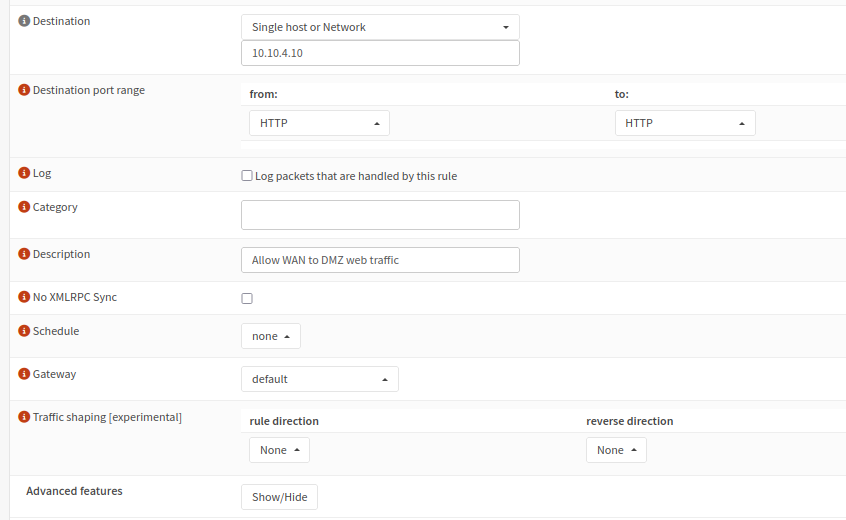
Save and apply the changes
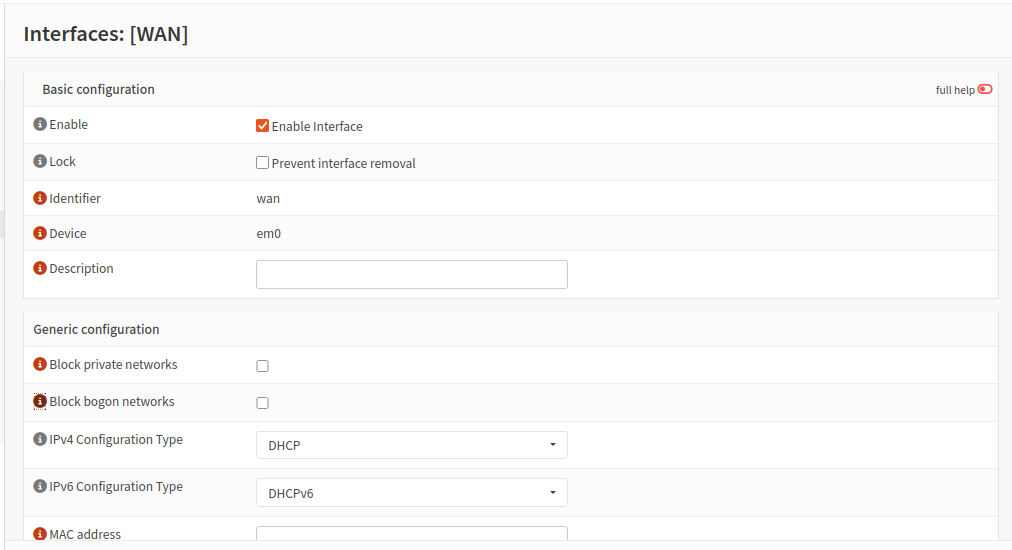
Finally, head to Interfaces > WAN
Under generic configuration, uncheck Block private networks and Block bogon networks. 192.168.1.0/24 is indeed a private address range, however in my lab setup, we consider it an external network (from the internal VMs’ perspective). We will need to uncheck this setting in order for devices on the home network to actually be able to reach the web server. Otherwise, all traffic originating from 192.168.1.0/24 will be blocked, no matter what firewall rules we have in place.
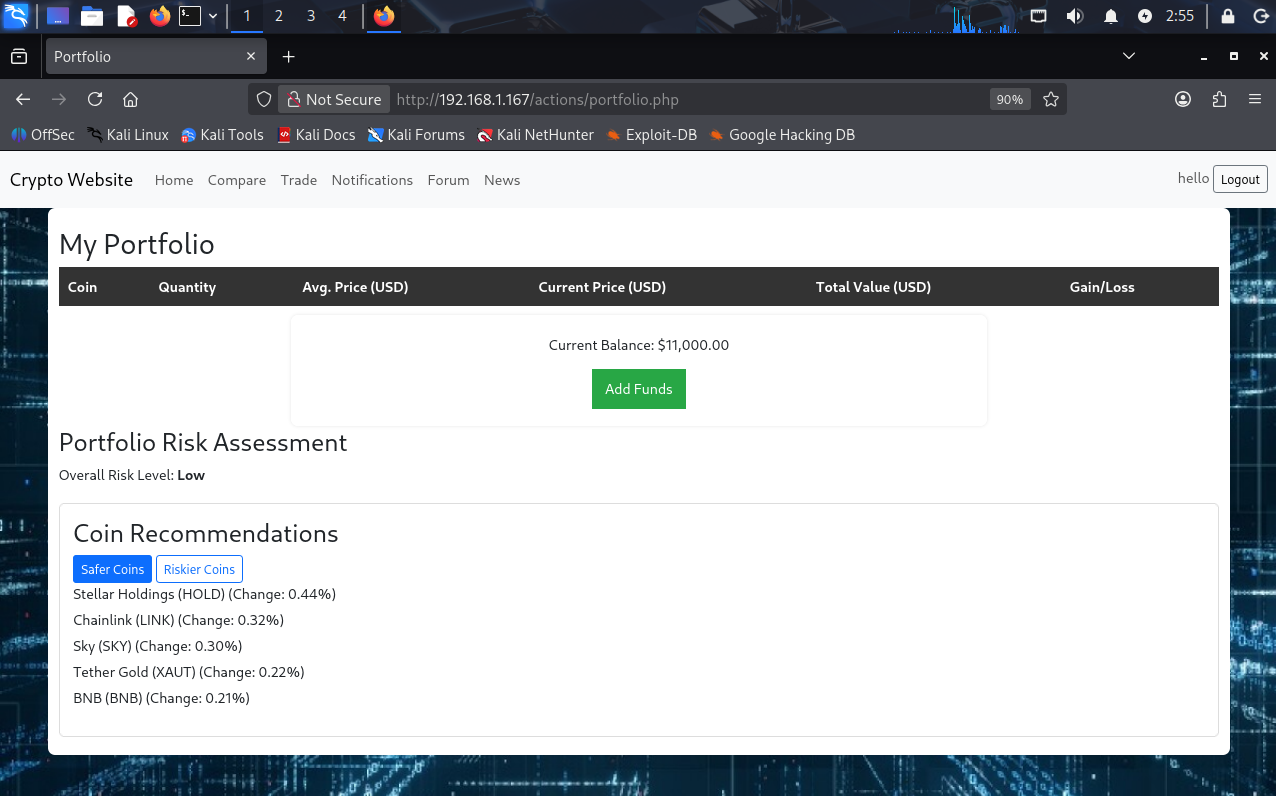
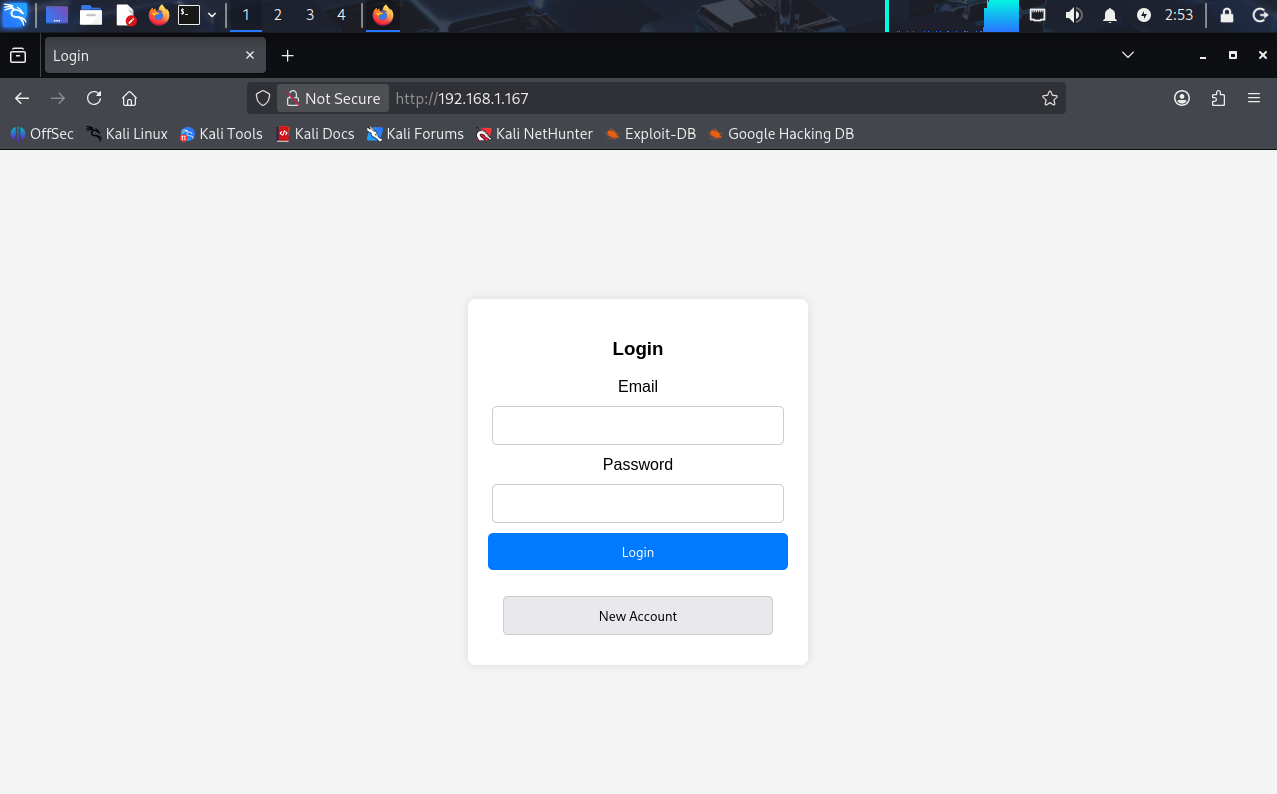
Now from Kali Linux, when i enter 192.168.1.167 (OPNsense WAN IP), I am redirected to the web server landing page.
I am even able to login and use the site.
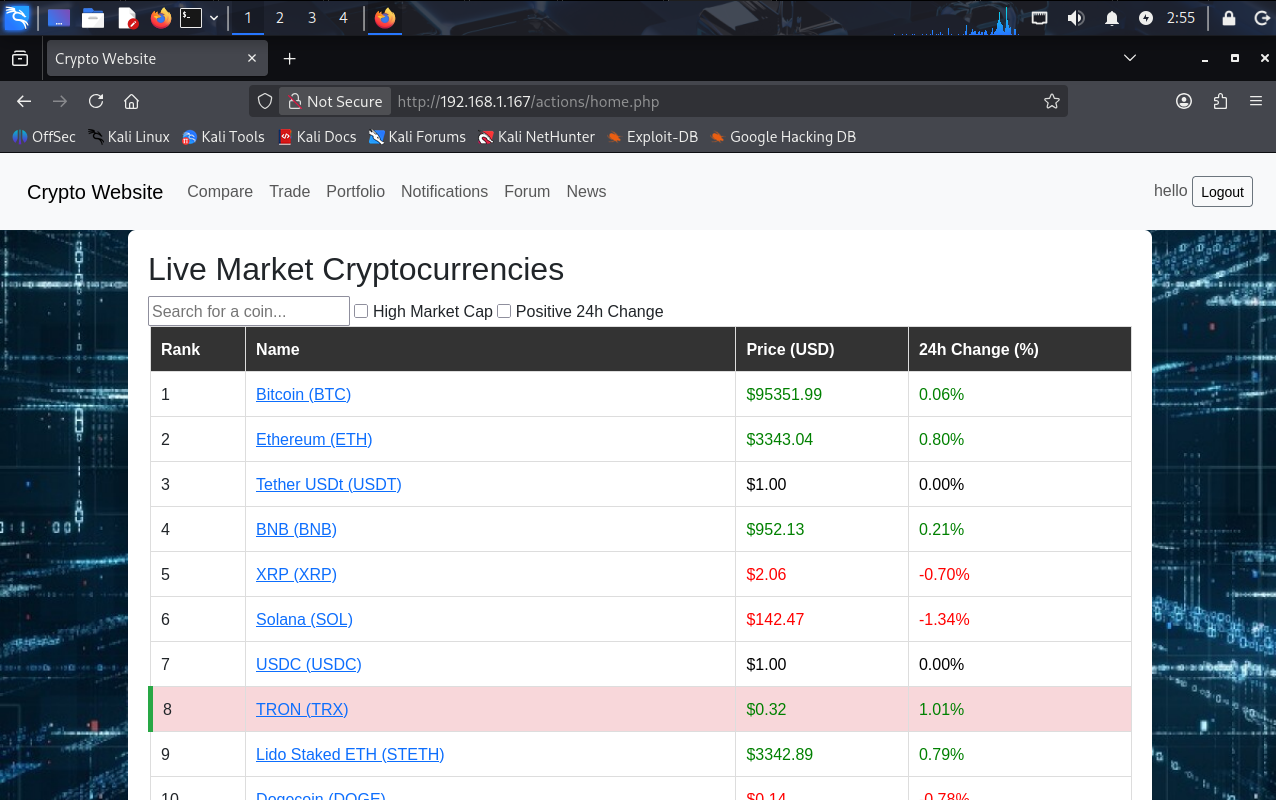
Testing: accessing other web pages.